Writing Unit Tests in Java Setup
Setup
Launch the IntelliJ IDEA application.
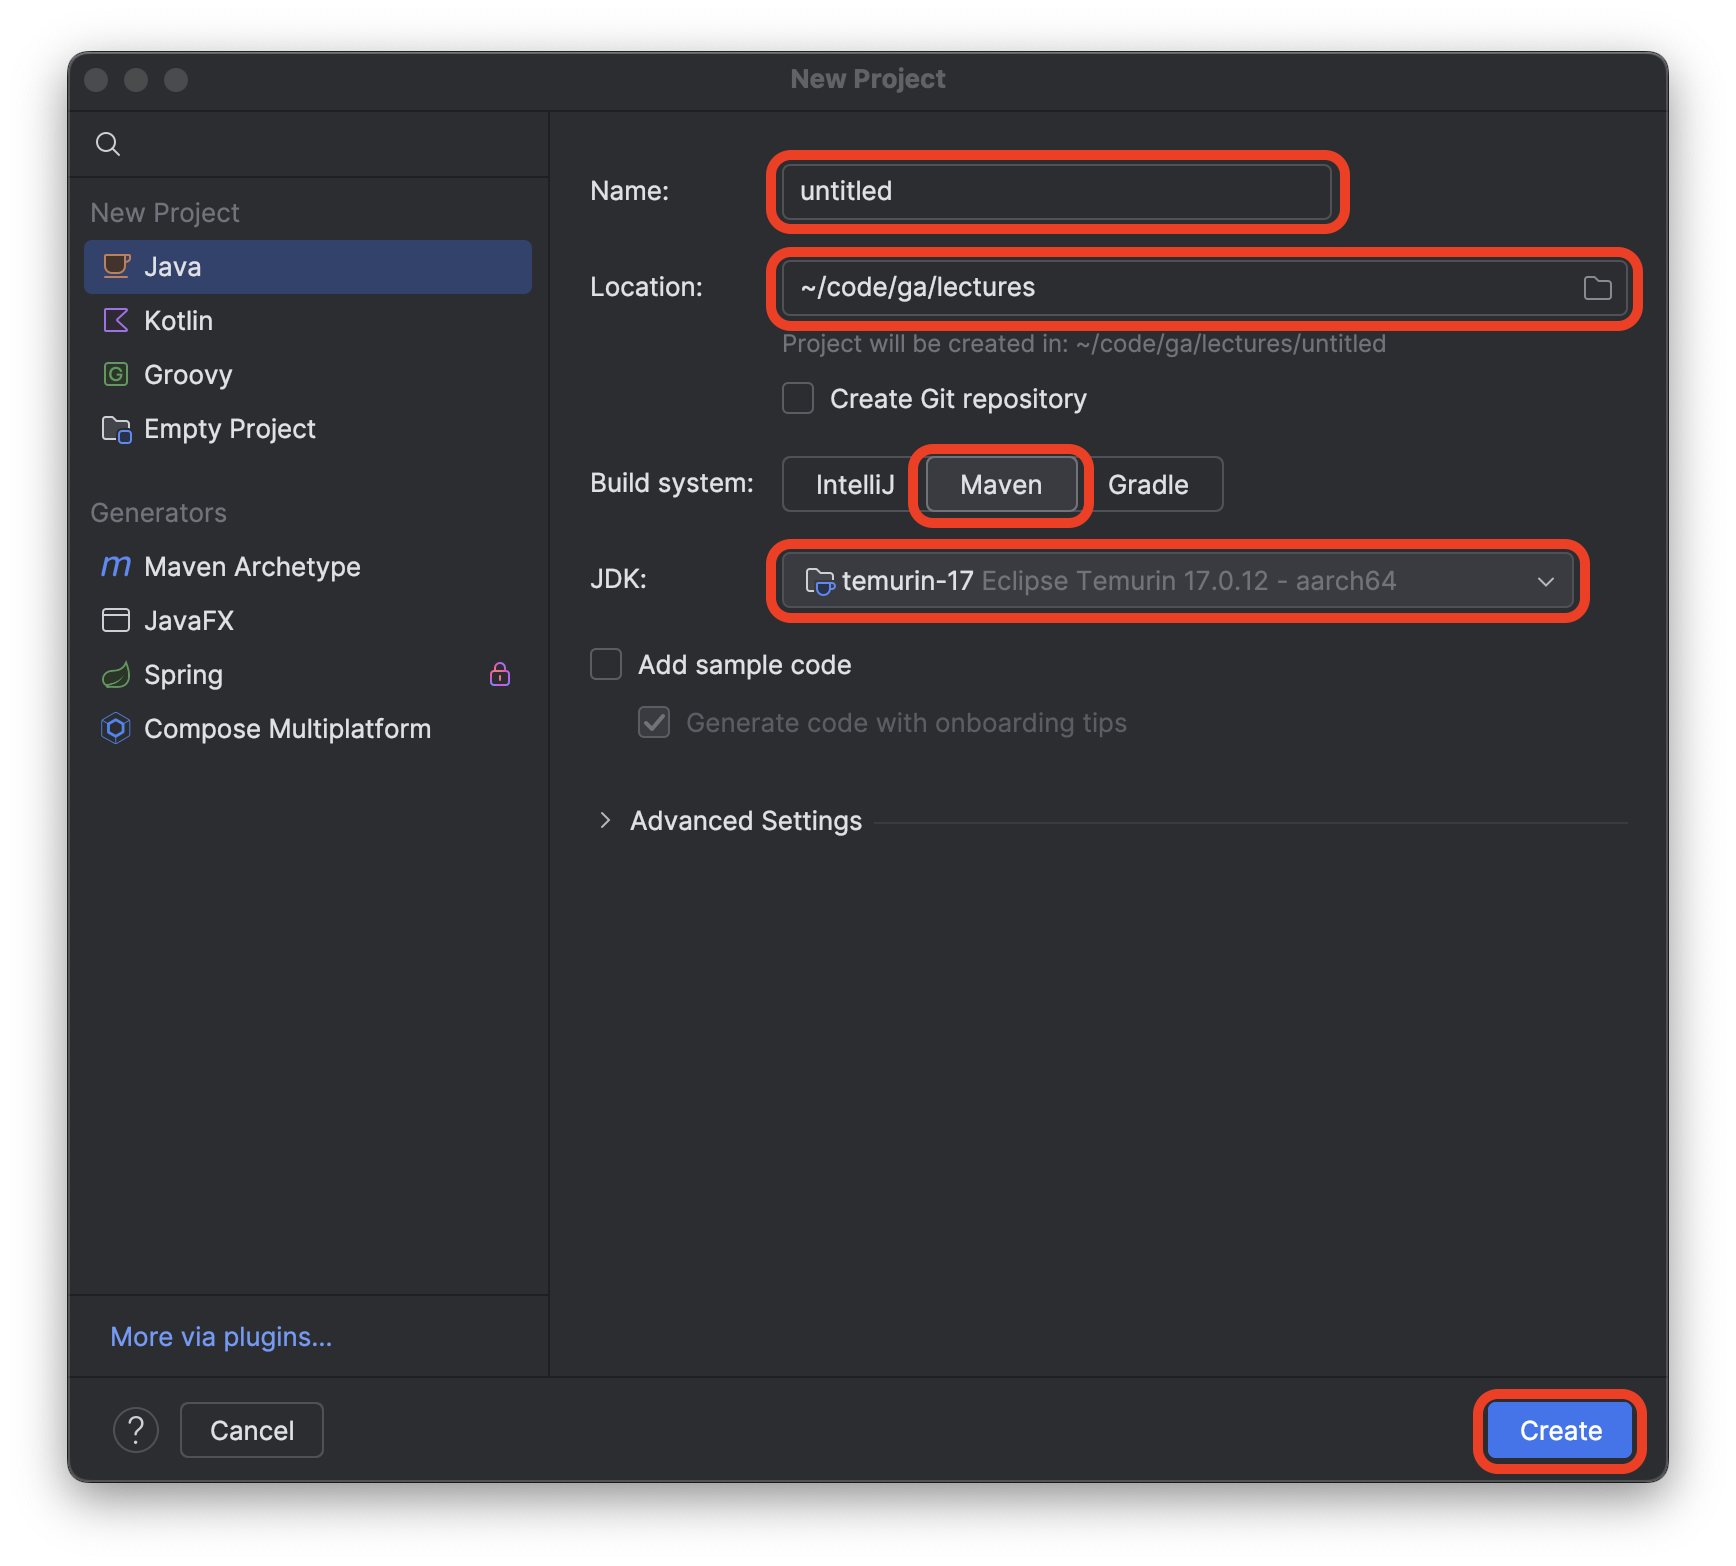
Select the New Project option.
Name the project writing-unit-tests-in-java.
Create the project in the ~/code/ga/labs directory.
⚠️ Windows users, the
labsdirectory is likely at this location on your device:C:\Users\username\code\ga\labs(replacingusernamewith your username). Create the project in that directory instead.
Choose the Maven build system option.
Ensure the JDK used is temurin-17. This should be the default setting when starting a new project. If it’s not, alert your instructor.
Ensure that the Add sample code option is not checked.
After confirming that the New Project window looks similar to the screenshot below, select the Create button. The name of the project should be writing-unit-tests-in-java, not untitled.
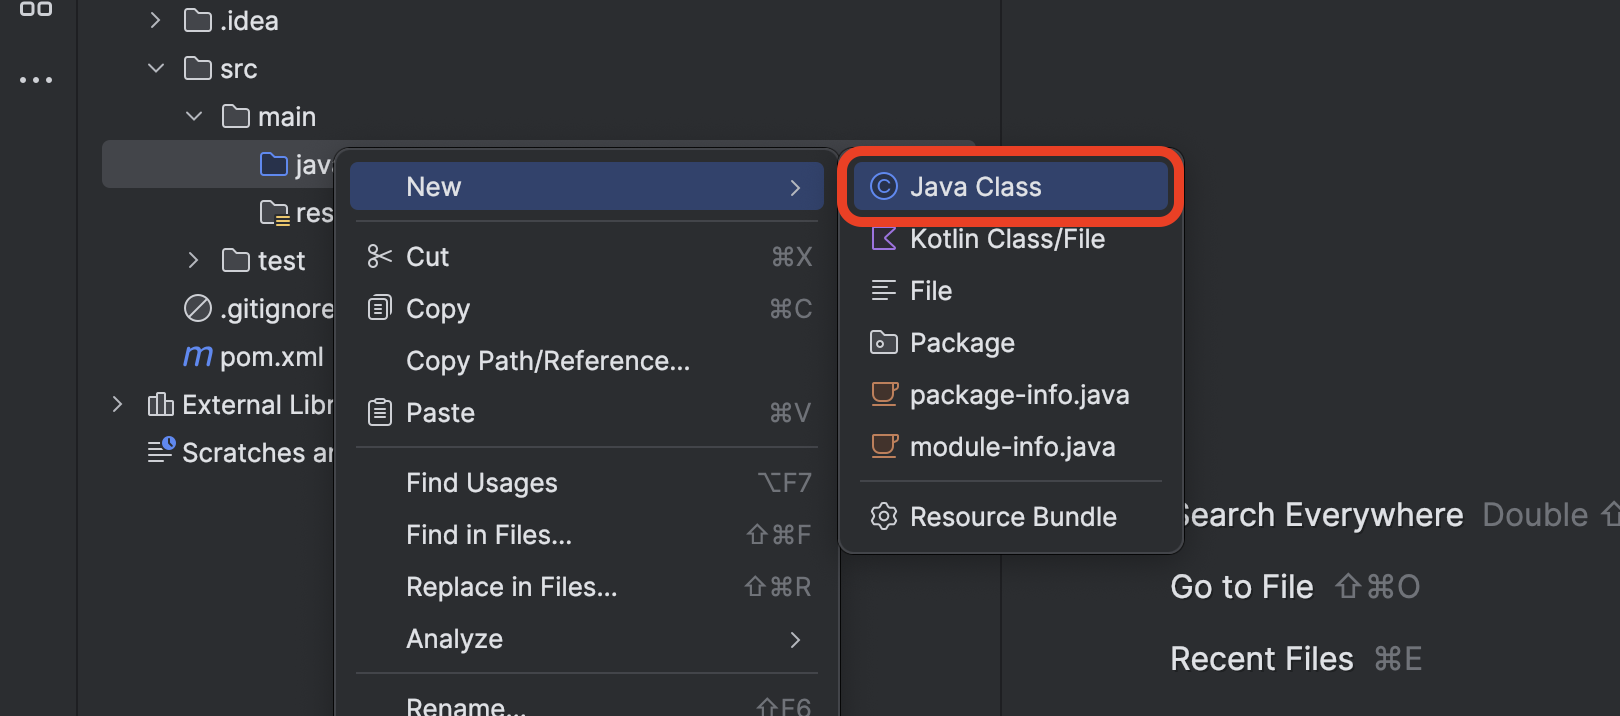
Right-click on the src/main/java directory and select New > Java Class, as shown in the screenshot below:
Name your new class org.example.Calculator as shown below.
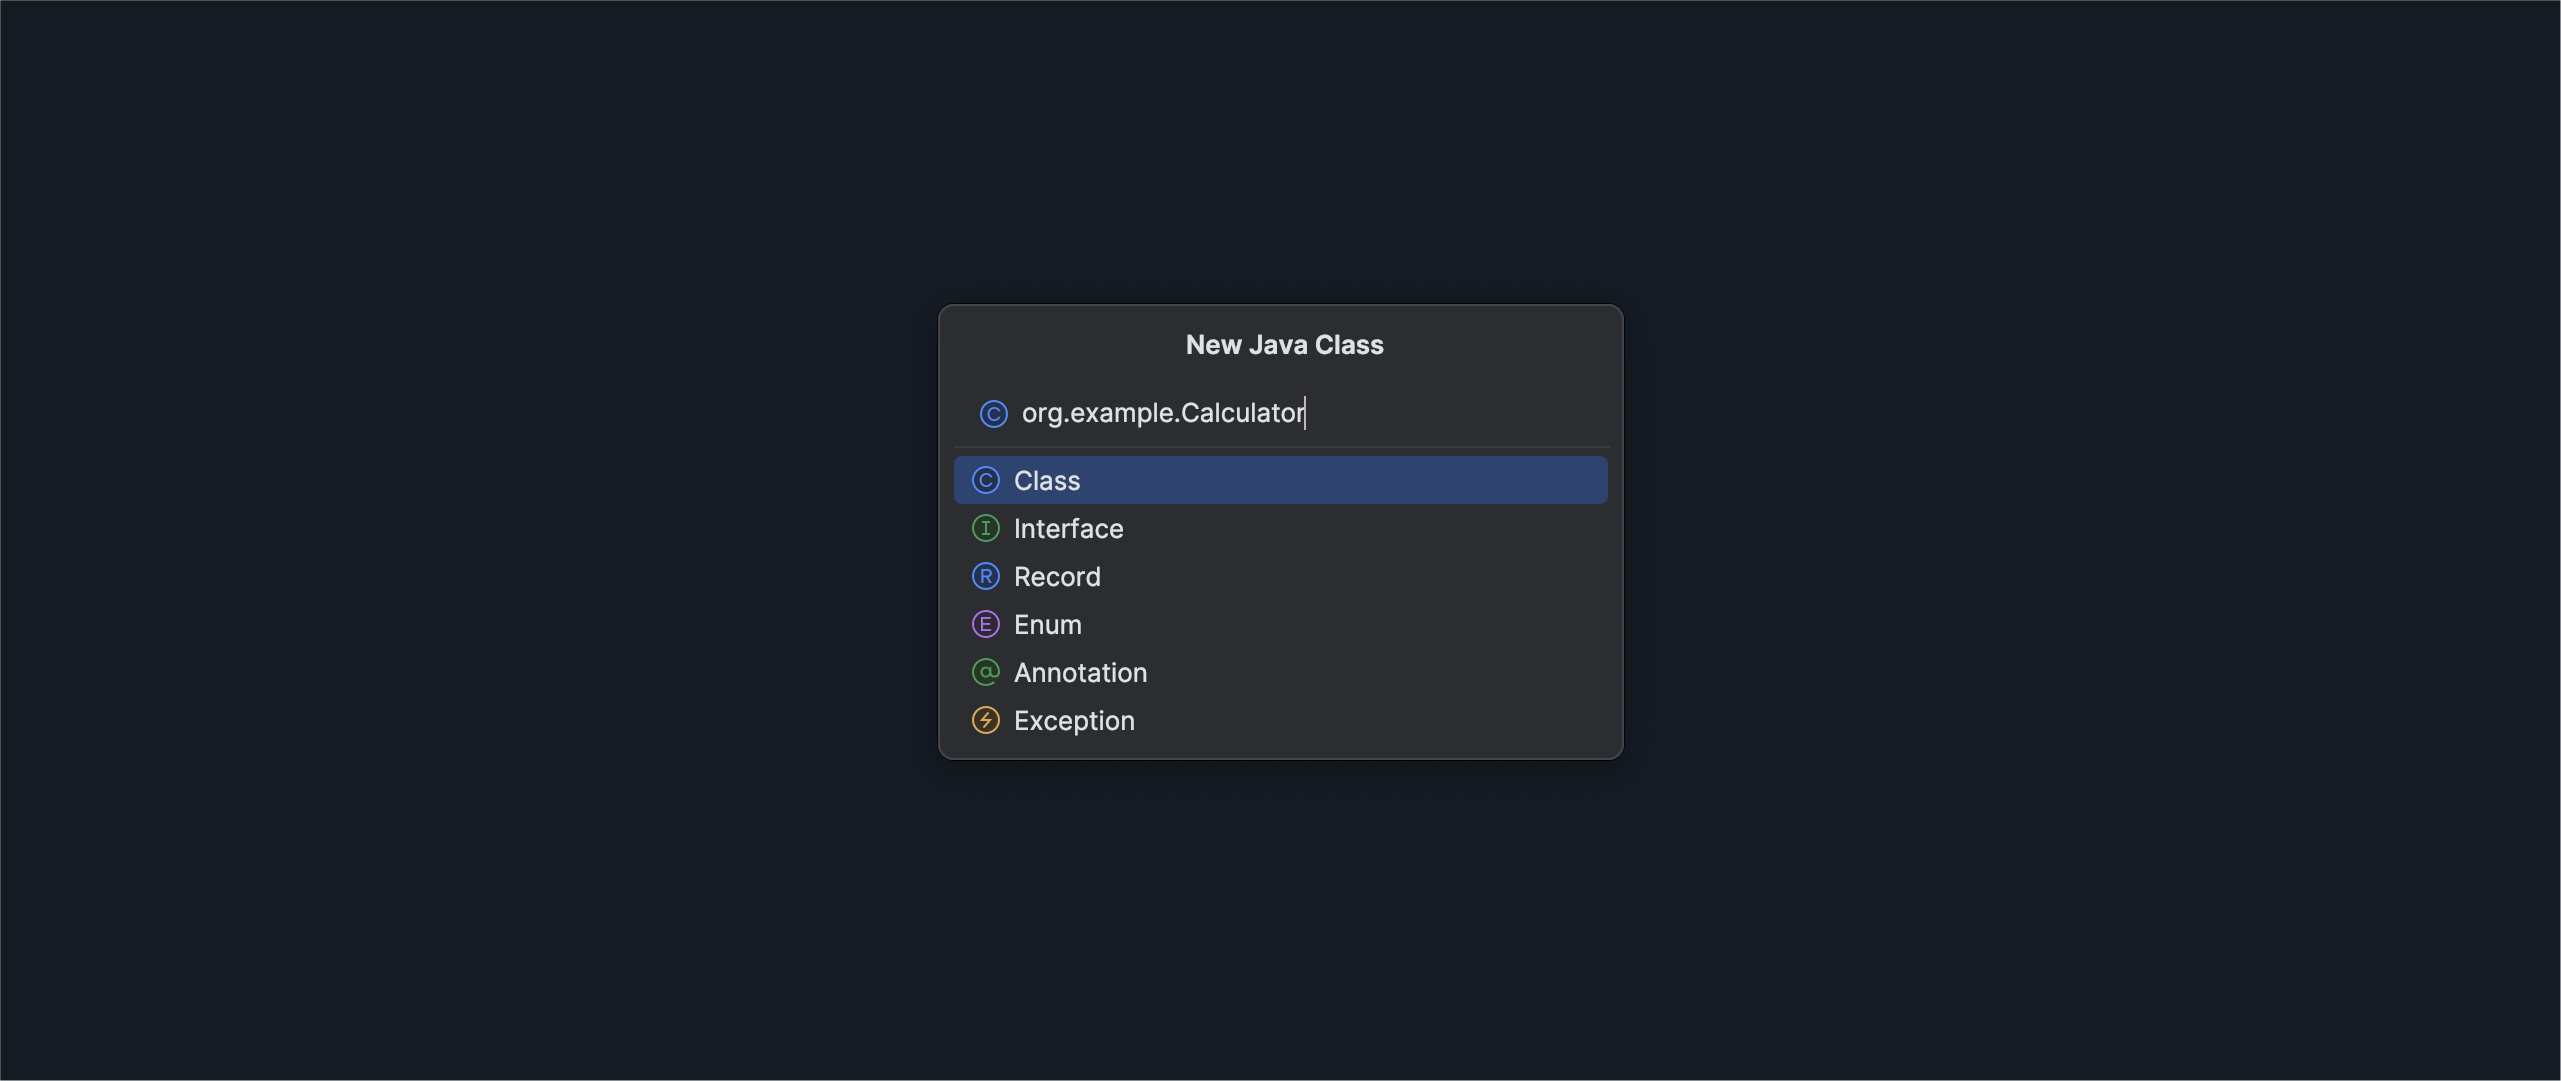
When your New Java Class prompt looks like the above, select the Class option from the list. You should be taken to the new Calculator.java file.
Add the required main() method inside of the Calculator class, including a print statement to confirm our setup worked:
    public static void main(String[] args) {
        System.out.println("This works!");
    }
Run this file now to test that our setup worked. Use the green play button in the top bar, or use Ctrl + R.
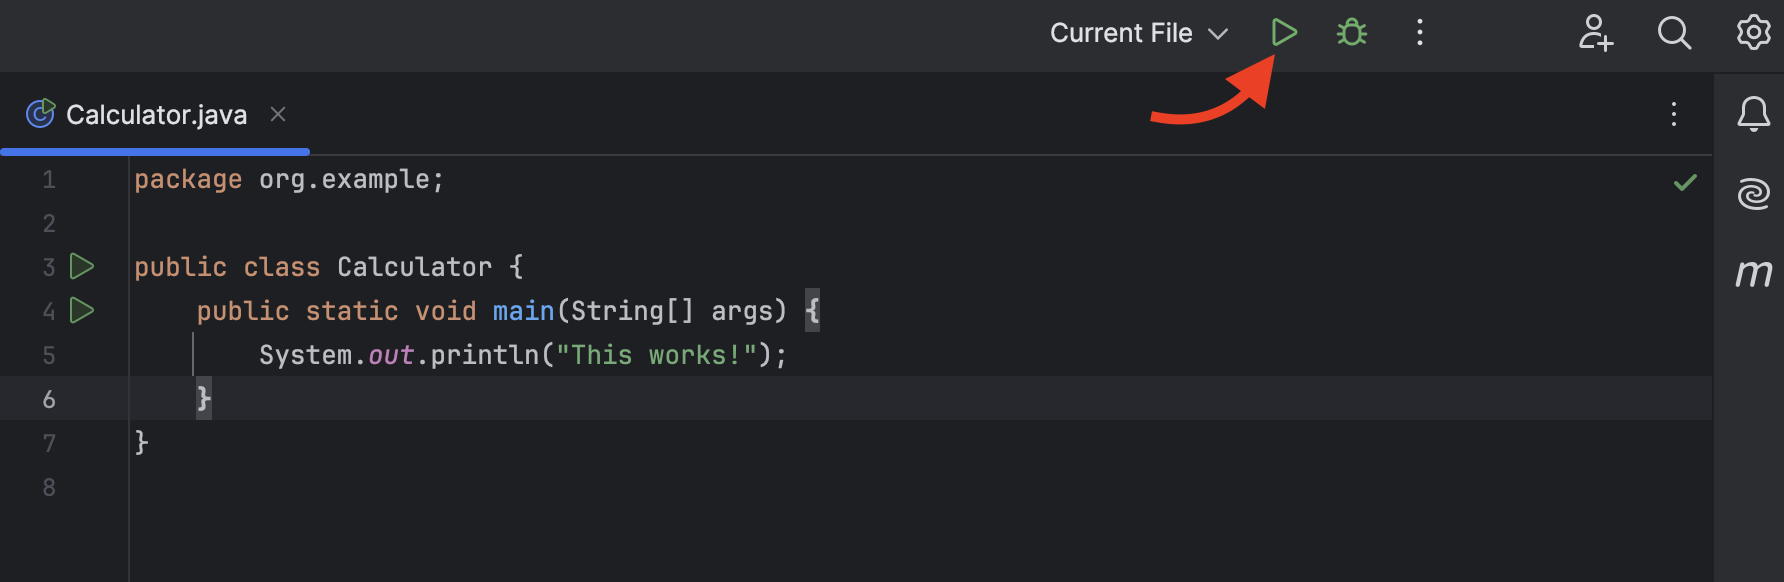
A Run panel will appear at the bottom of the window, and you should see a message: This works!
We can get to work now that our project is set up.