Writing Unit Tests in Java Creating a JUnit5 Test Class
Learning objective: By the end of this lesson, you’ll be able to create and setup a JUnit5 test class in IntelliJ IDEA IDE for any class that’s part of your source code.
Creating a JUnit5 test class in IntelliJ IDEA IDE
In this module we’ll learn how to create a JUnit5 test class that can be used to code automated tests that run on our Calculator class.
Step 1
Open the src/test directory in the Project tool window. Note the child java directory icon is green and the directory has a green background.
-
This green directory icon indicates that the
src/test/javadirectory is the Test Sources Root. This directory will store our test code. This was automatically configured for us when we built our project using the Maven build system during our project setup. -
This is another example of the Maven convention in practice. Technically any directory could be the Test Sources Root by right clicking the chosen directory and selecting Mark Directory As > Test Sources Root , but there’s no reason to break with the convention in this case.
🧠 You may have noticed before that the
src/main/javadirectory’s icon is blue, which indicates it is the Sources Root.
Step 2
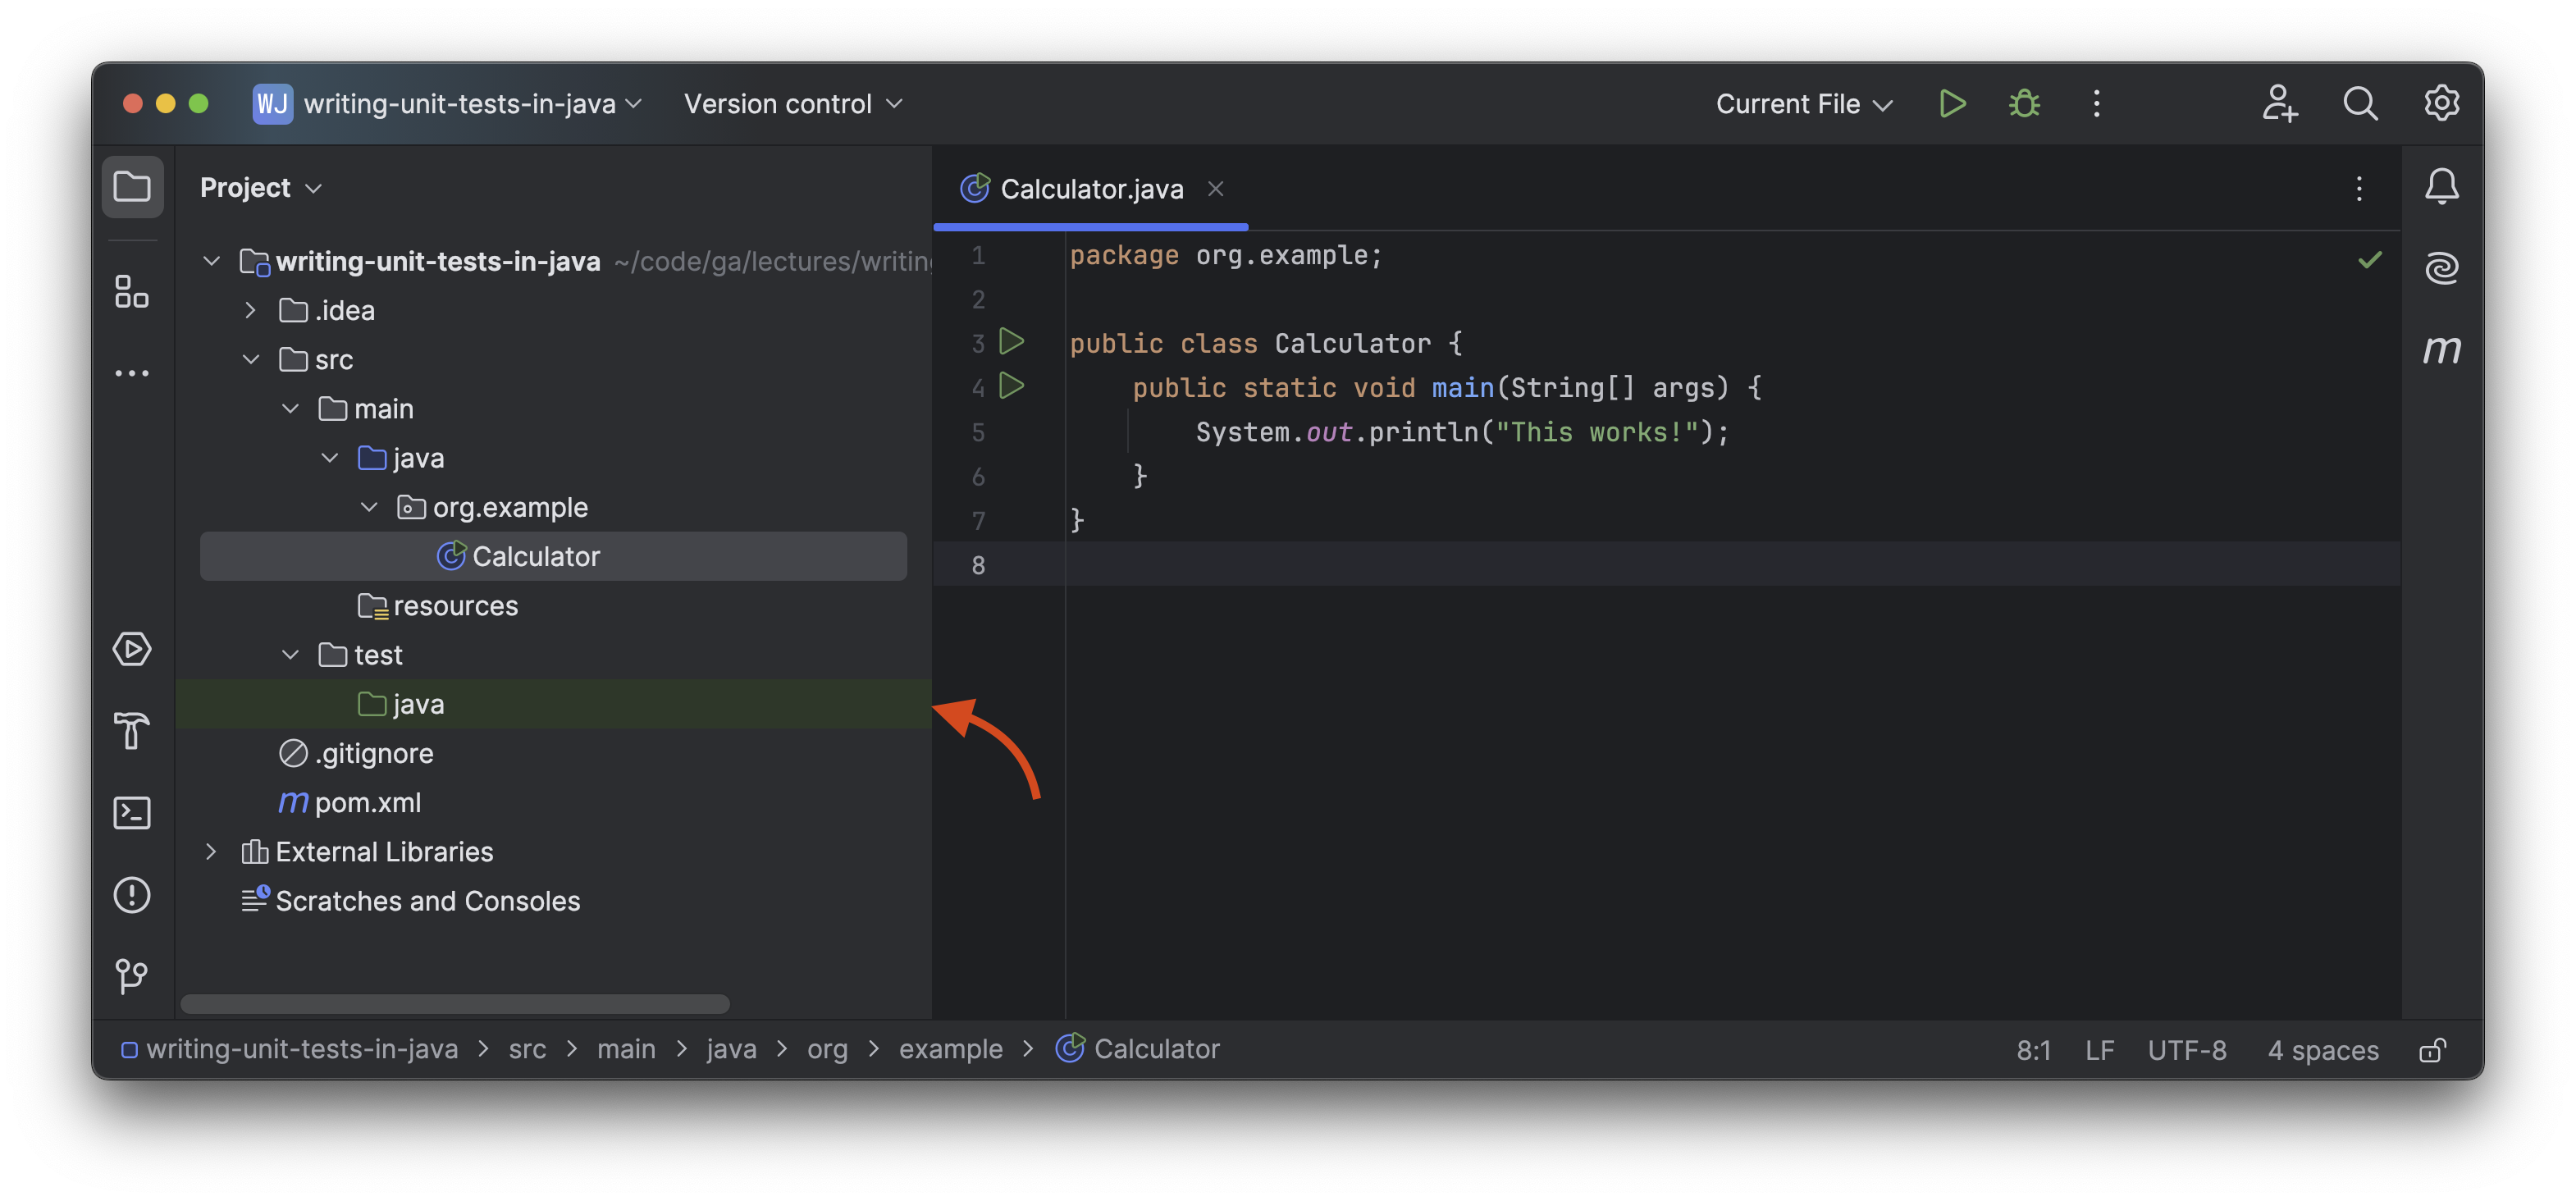
Open the src/main/java/org/example/Calculator.java file. Click the Calculator class name so that the caret is somewhere inside the text and the Calculator text is highlighted in orange as shown outlined in the screenshot below.
![]()
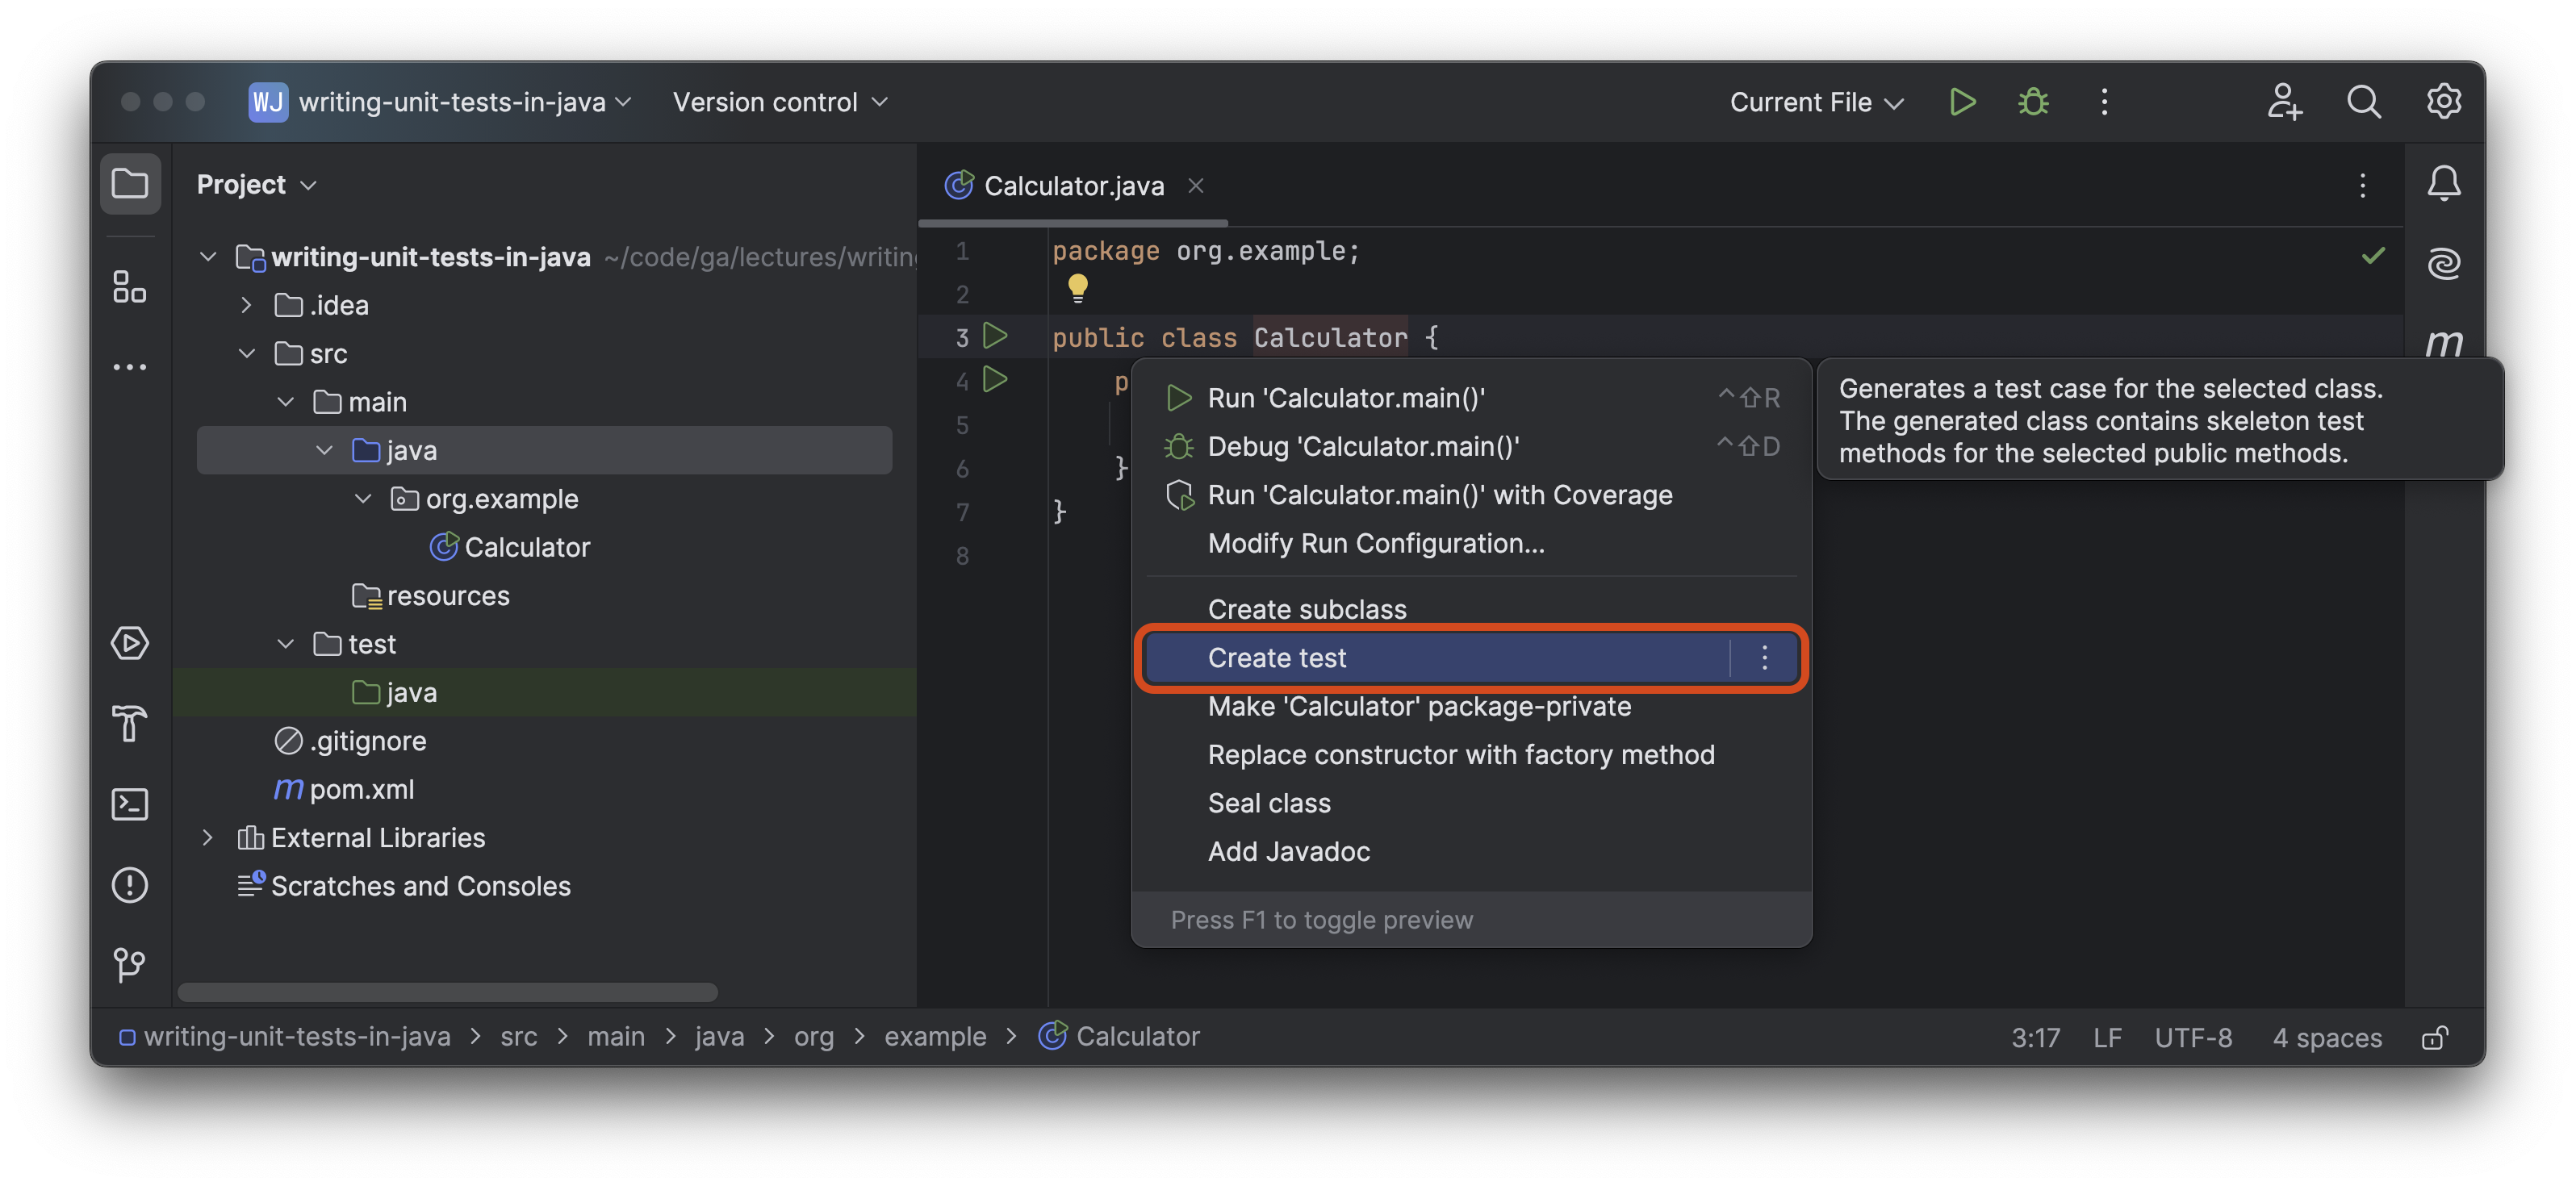
With the caret here, use ⌥ Option + ↩ Enter (Alt + Enter in Windows and Linux) then select the Create test option shown outlined in red in the screenshot below.
Step 3
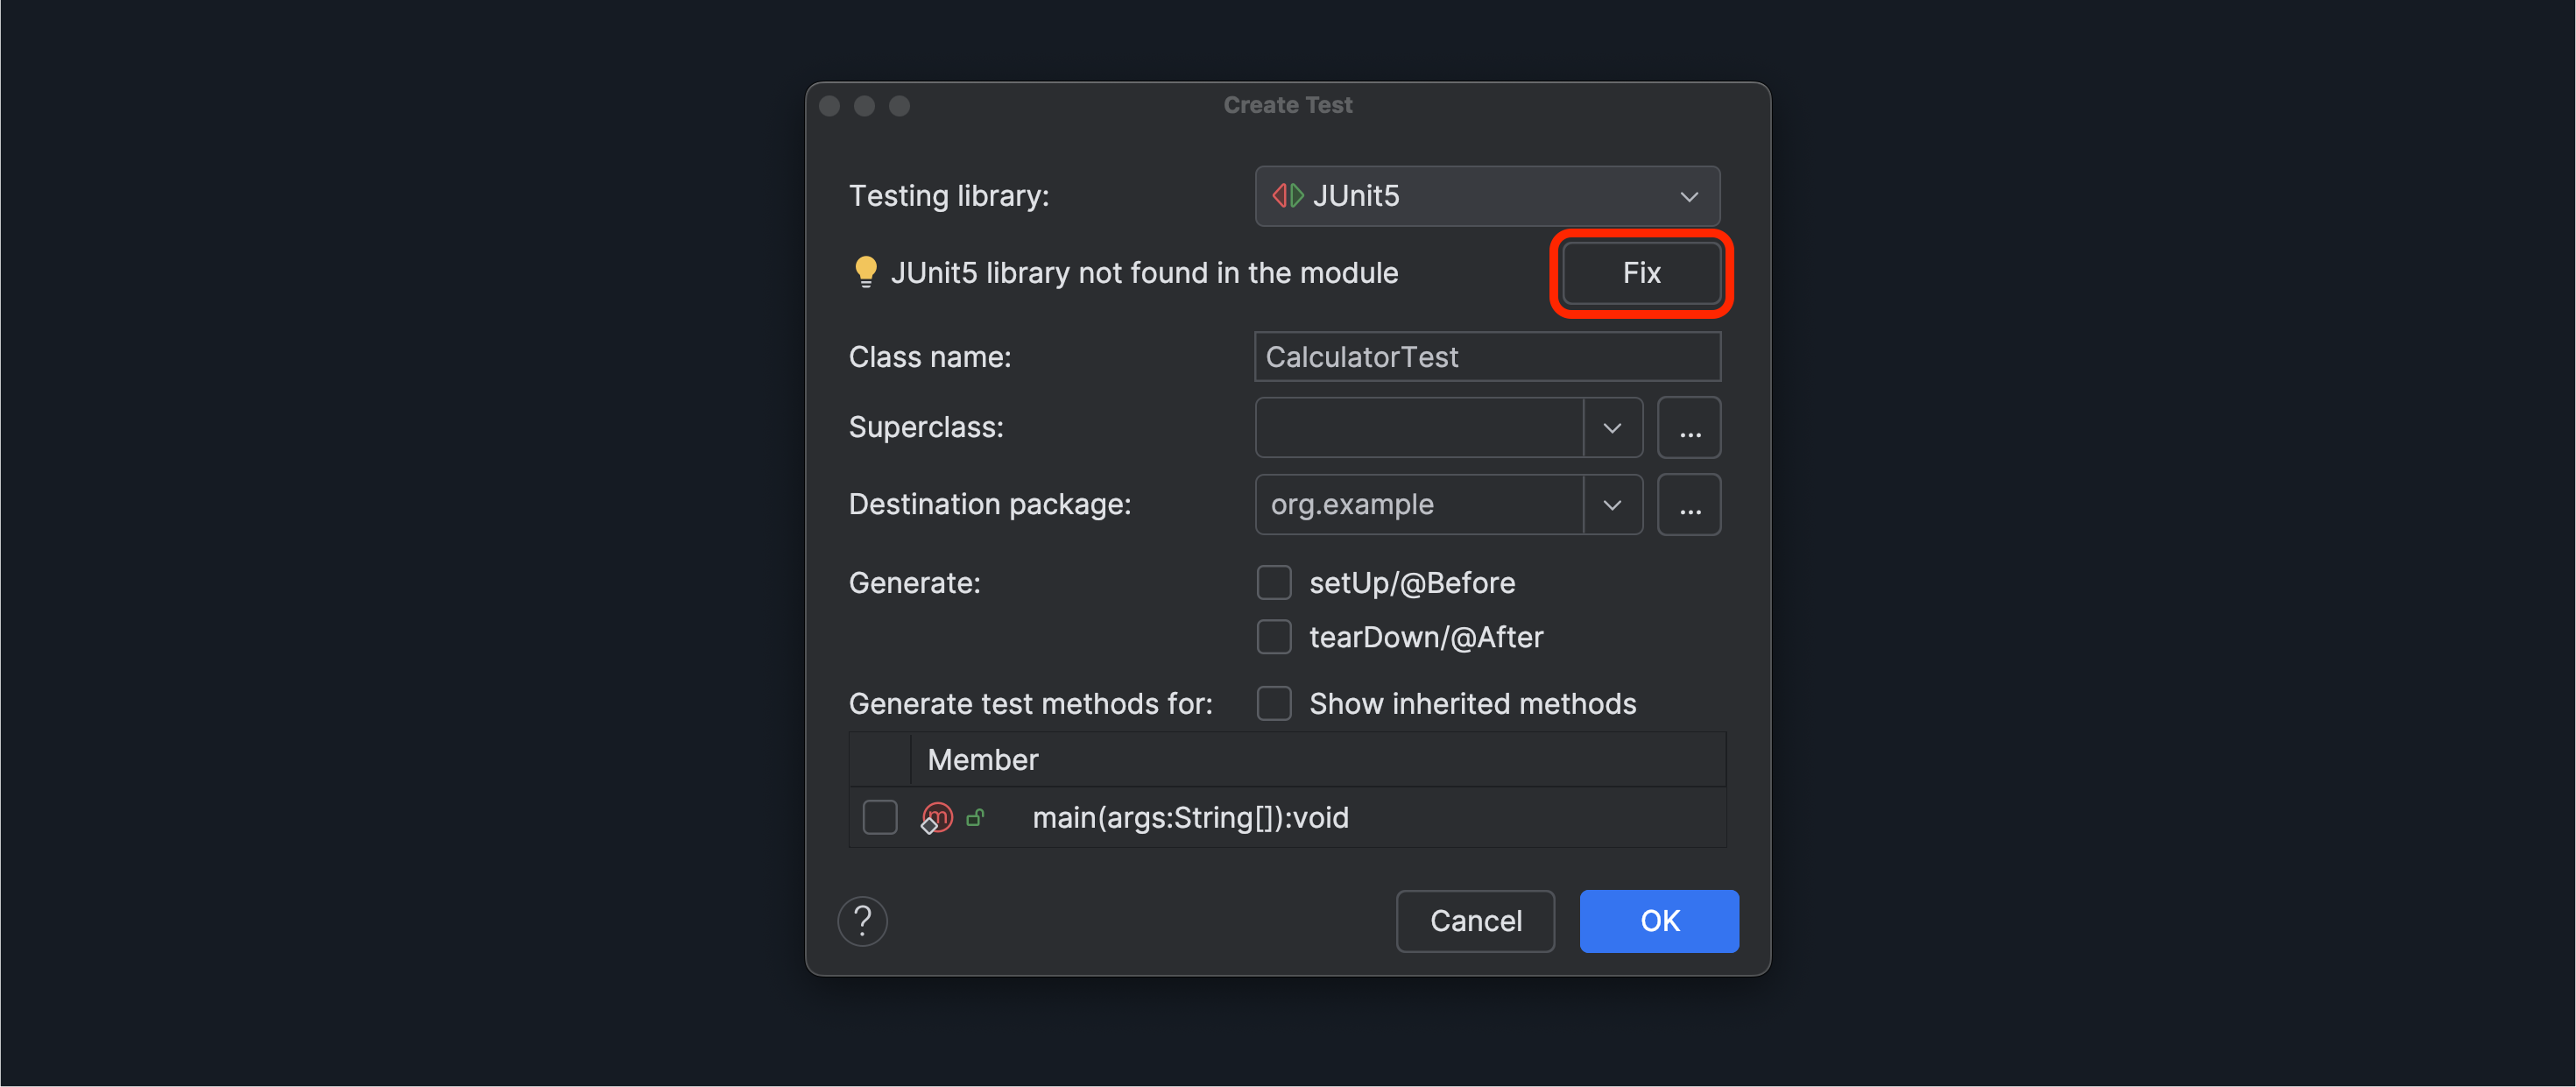
A Create Test dialog box will appear. Create the new test with the below options:
- Select JUnit5 as the testing library.
- The class name should be
CalculatorTest. - There is no superclass.
- The destination package should be
org.example. - Do not generate / generate test methods for.
We need to add the JUnit5 library to our project to use it. Once your Create Test dialog box looks like the one in the screenshot below, select the Fix button.
It might not look like anything is happening after you click this button, but in the background, the appropriate libraries should now be in your project.
After you’ve clicked the Fix button, click the blue OK button.
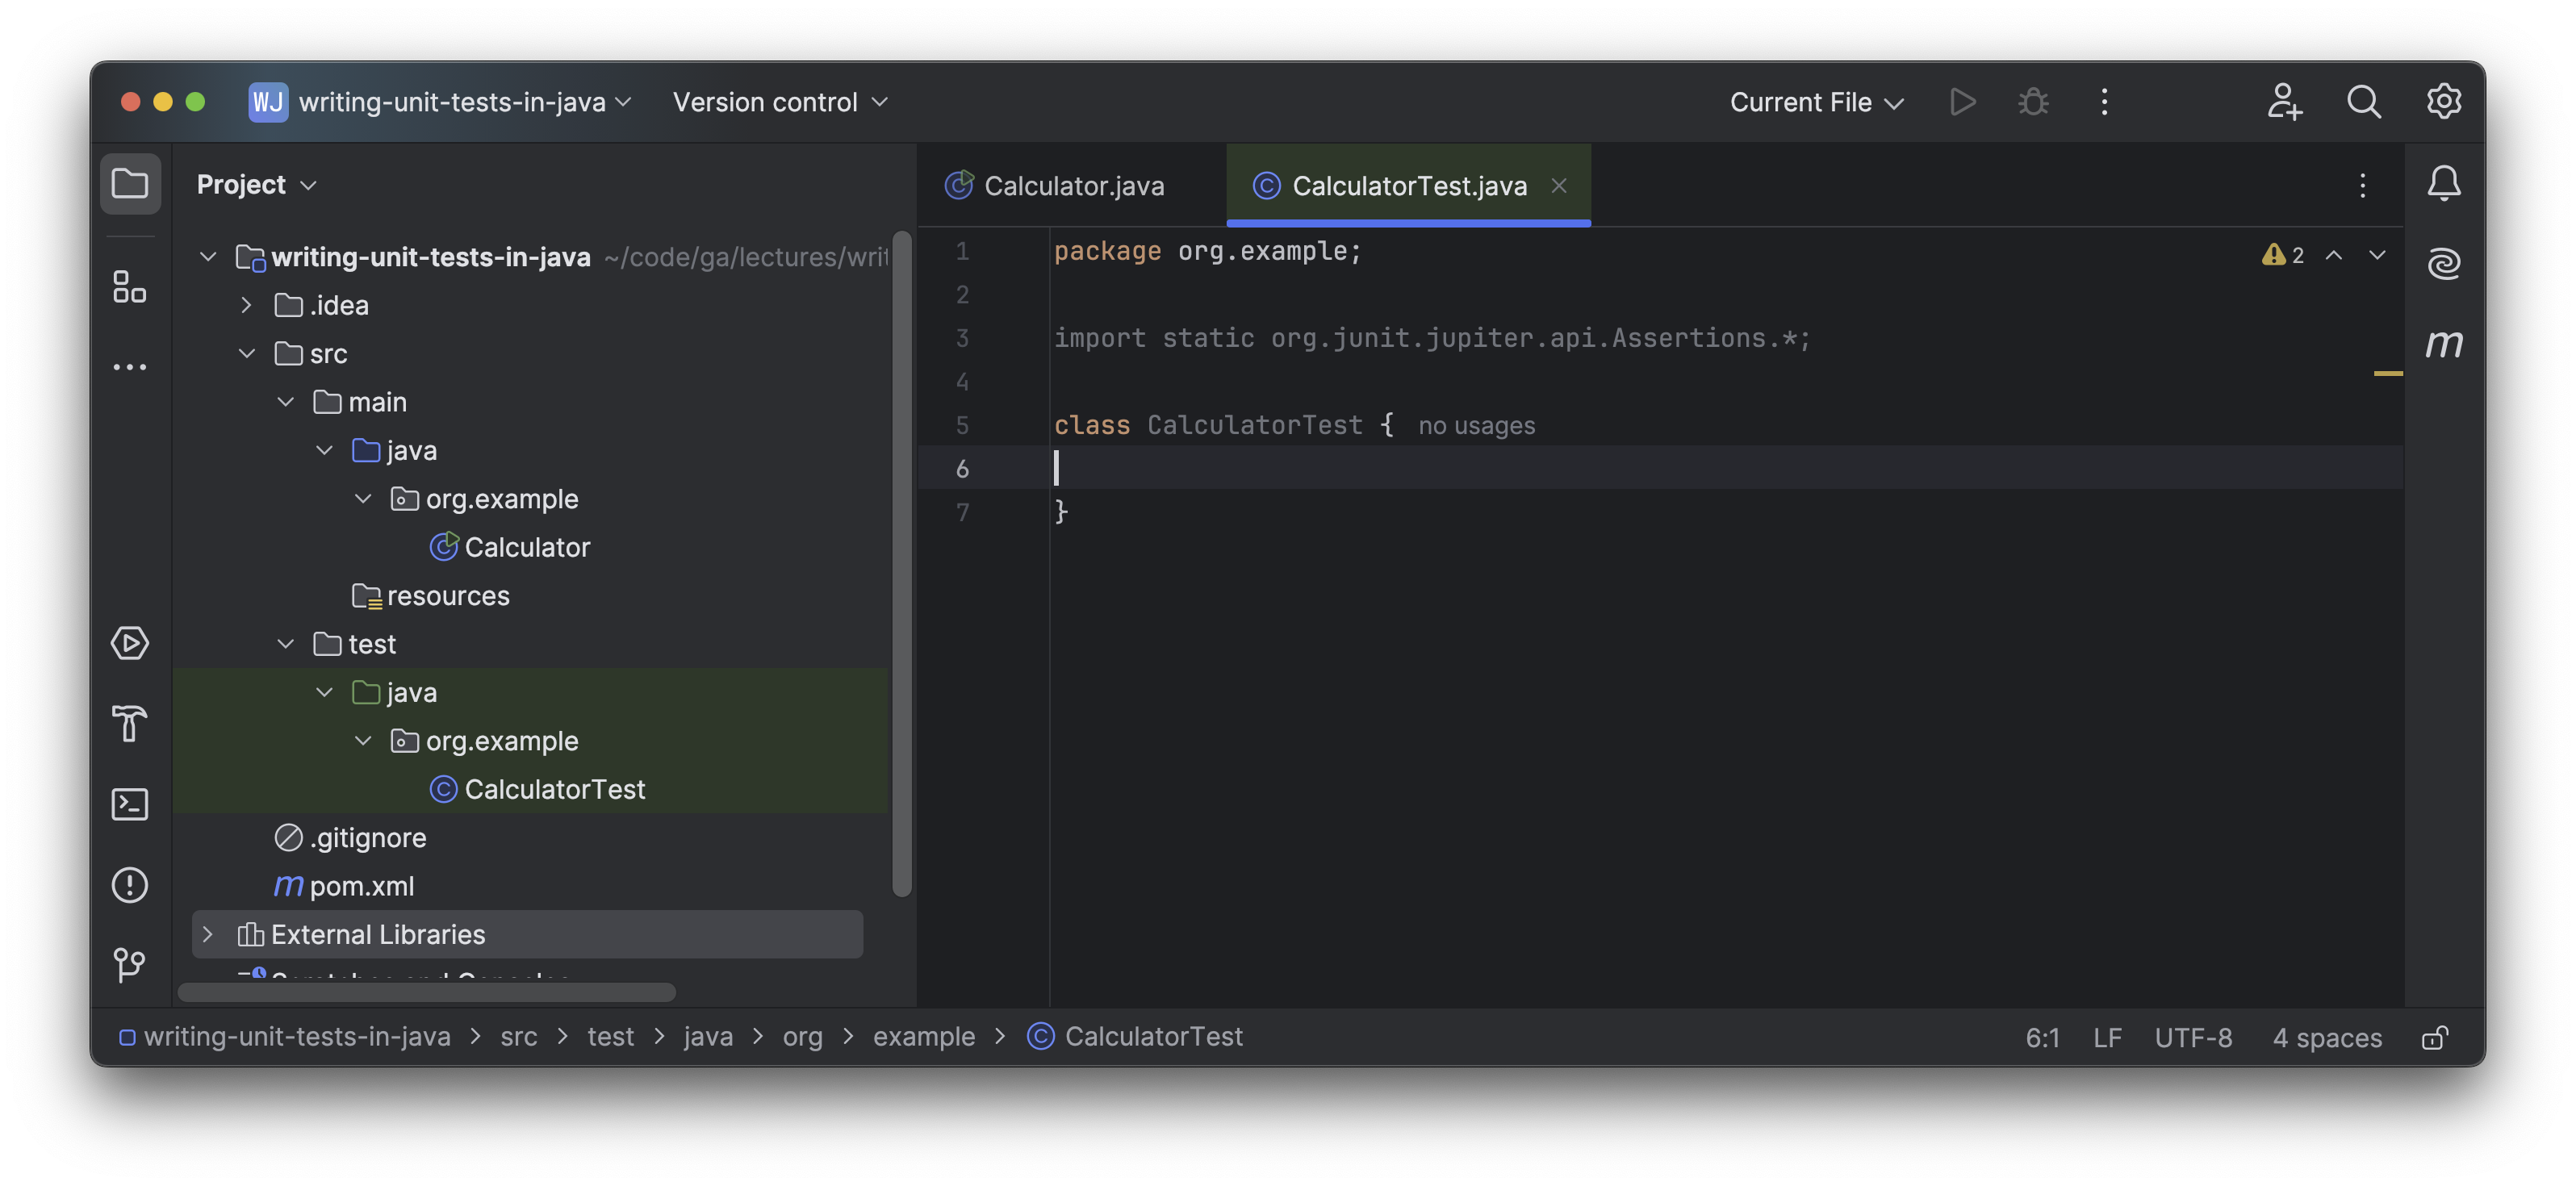
This will create a new CalculatorTest class in the src/test/java/org/example/CalculatorTest.java file, ready for you to start writing tests in.