React Router DOM Creating Routes
Learning objective: By the end of this lesson, students will be able to create client-side routes with React Router.
Implementing client-side routing with React Router
With our navigation bar in place, we can now define the content that should be rendered at each location in our app with some client-side routing. Through client-side routing, we can render different components based on the URL, mimicking the functionality of a traditional multi-page website within a single-page application.
To build out these routes, we use two components provided by React Router:
-
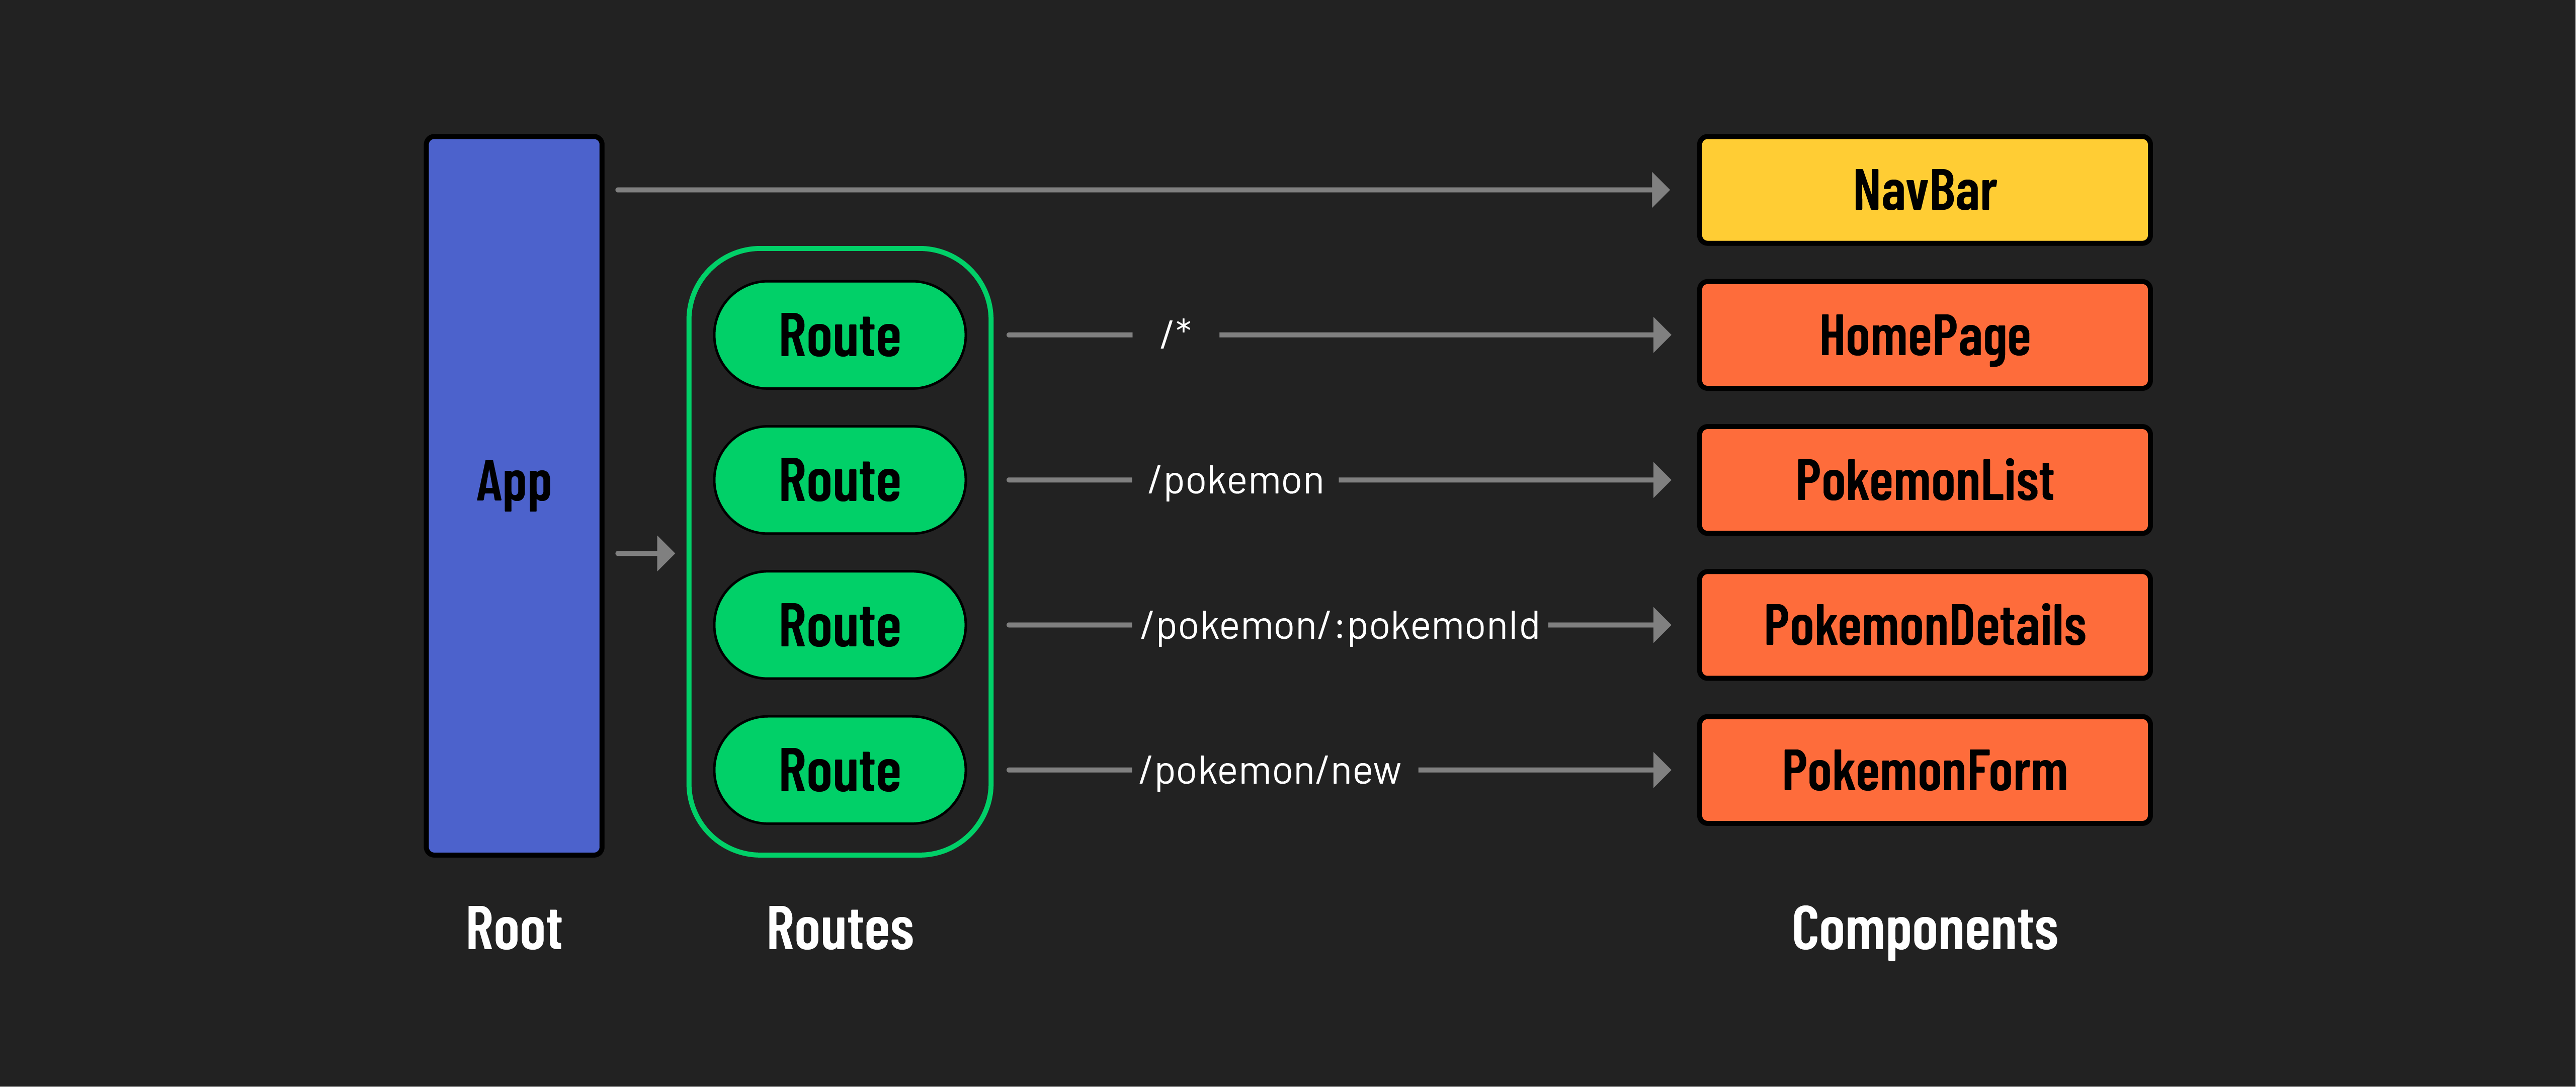
<Route>: Used to define individual routes within the application. Each<Route>specifies apathand anelementto render when that path is accessed. -
<Routes>: Acts as a container for individual<Route>components. When a user accesses a URL, the<Routes>component looks through its child routes to find the best match, rendering the corresponding UI.
Below is a diagram depicting the client-side routes that we’ll build out in our application:
Defining routes
At the top of App.jsx, let’s import Route and Routes from react-router:
// src/App.jsx

import { Route, Routes } from 'react-router';
Next, we’ll need to adjust the return statement to include the <Routes> component. This <Routes> component will contain all of the individual routes for our application.
Update the following in App.jsx:
// src/App.jsx

  return (
    <>
      <h1>Pokemon!</h1>
      <NavBar />
      <Routes>
        <PokemonList pokemon={pokemon} />
      </Routes>
    </>
  );
Currently, our navigation bar has a link directing users to '/pokemon'. Let’s define a <Route> so that the <PokemonList> component is rendered at this path.
// src/App.jsx

      <Routes>
        <Route path="/pokemon" element={<PokemonList pokemon={pokemon} />} />
      </Routes>
With the above <Route> component, we have defined a path as /pokemon and the element as the component <PokemonList /> to render when that path is accessed. Note that we didn’t change anything at all about the component itself; we’re just defining what route it should be rendered on.
Start the app up and open up your browser. Click on the ‘Pokemon’ link in the nav bar to navigate to '/pokemon'. You should see the pokemon data being rendered! If you navigate back to '/' with the ‘Home’ link, you might notice that only the page header and <NavBar /> are being rendered. Let’s address that issue in the next section.
Creating a default route
To set up a default route (home page), we could create a new Homepage.jsx component, but we can also define some JSX to render directly in the element prop. Let’s go with the second option to better demonstrate some of the flexibility you have in building routes.
Add the following to the <Routes> in App.jsx:
// src/App.jsx

      <Routes>
        <Route path="/" element={<h2>Home Page</h2>} />
        <Route path="/pokemon" element={<PokemonList pokemon={pokemon} />} />
      </Routes>
Try it out in your browser. Using the nav bar, try navigating between the two pages.