Openhouse Wrap Up
Learning Objective: By the end of this lesson, students will understand the planning and functionality essential for building this application.
Recap
Congratulations! You’ve just completed building an Express application where data relationships are managed through referencing. Let’s take a moment to review what we’ve achieved.
Project planning review
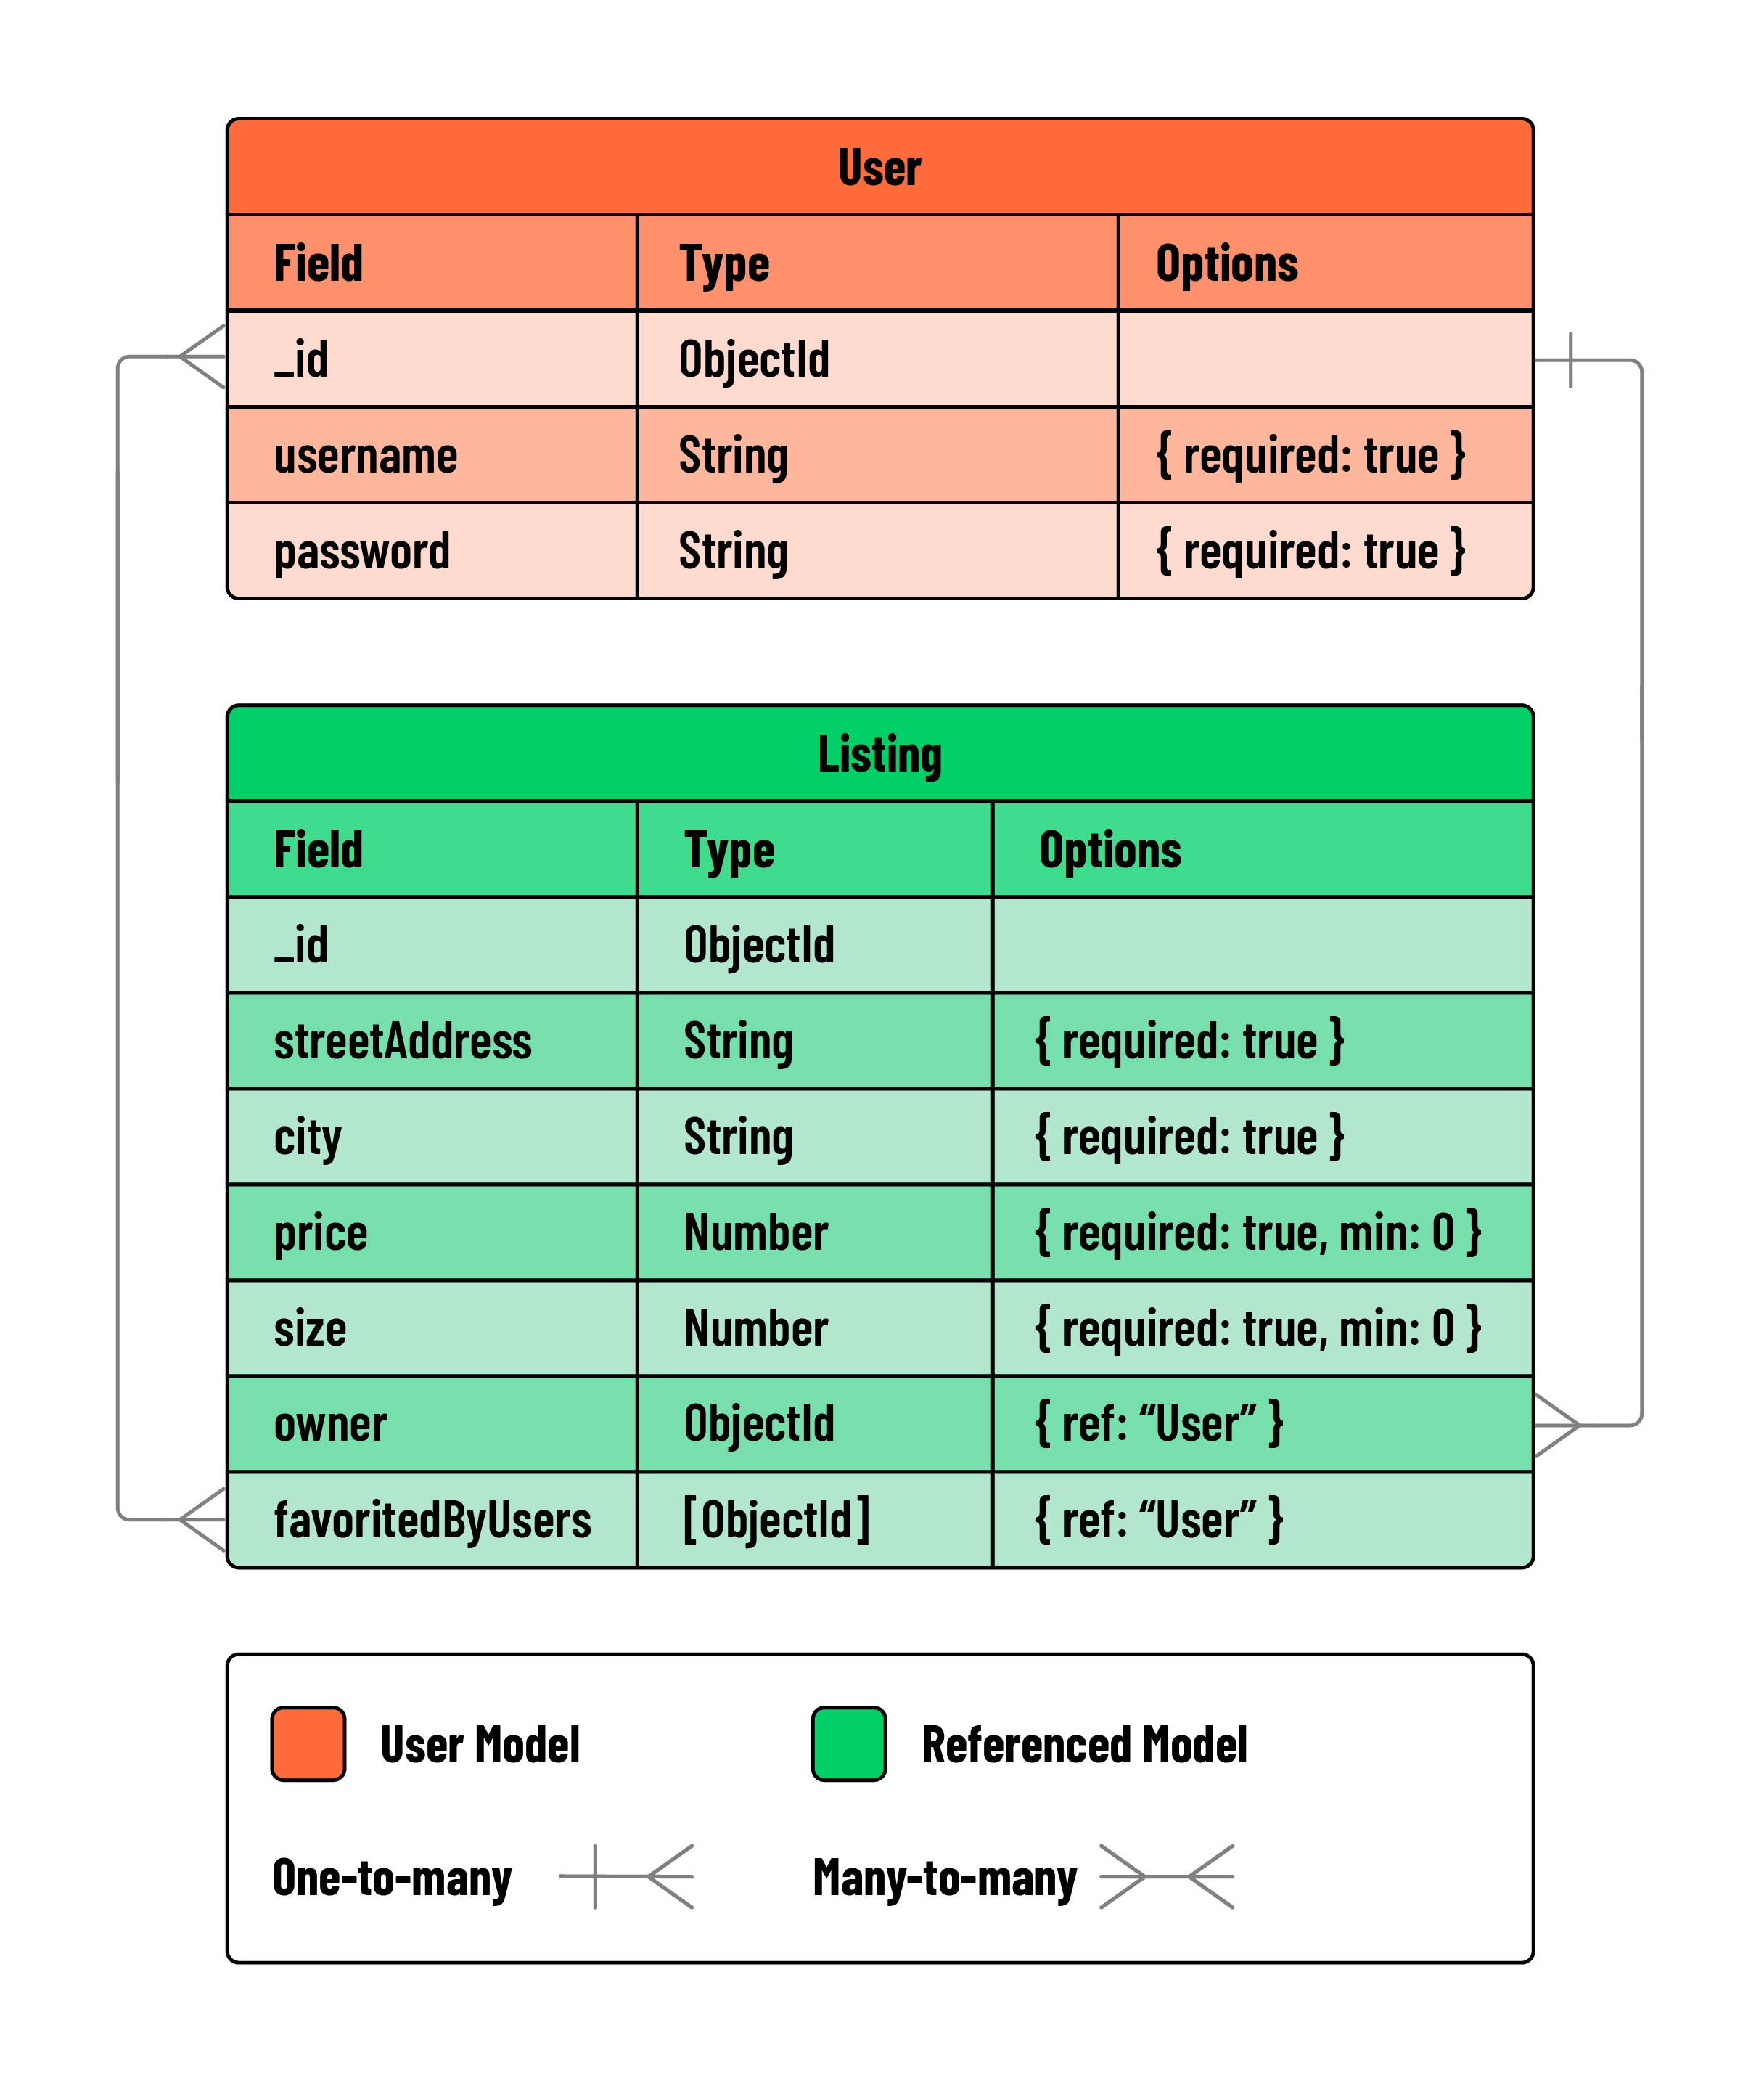
Our application allows users to create listings for the properties they own. Details they can track are:
- Street address
- City
- Price
- Size in sq ft
- Owner
- Users who have favorited the listing
Users can browse all listings, access listing details, create new listings, edit existing ones, and delete listings. Additionally, users can favorite or unfavorite a listing.
We built out our user stories and ERD to help us plan out this application. We also built out our application in a way where we can easily add new features to it.
User stories
User stories are a way to describe an application’s functionality from a user’s perspective. Remember, they are often written in the format of:
As a user, I want to do X for Y reason
User stories are often used as a checklist to work through as we build out an application.
ERD
Entity relationship diagrams (ERDs) are a way to visualize the structure of the data in an application. They are often used to plan out the structure of an application’s database.
Referencing one-to-many relationships
We have learned how to reference one-to-many relationships in our application. We have done this by adding a reference to the owner field in our listings collection. This allows us to track which user owns a listing.
The process of referencing one-to-many relationships is:
- Add a field to the Schema of the many side of the relationship.
const listingSchema = new Schema({
  // other fields
  owner: {},
});
- Add a reference to the Schema of the many side of the relationship.
const listingSchema = new Schema({
  // other fields
  owner: {
    type: Schema.Types.ObjectId,
    ref: 'User',
  },
});
💡 We use the
refkey to tell Mongoose which collection to use for the reference. In this case, we are referencing theUsercollection.
Lastly, we could have embedded the listingSchema inside of the userSchema to accomplish much the same relationship. This would still be a one-to-many relationship. However, we have chosen to reference the User collection from the Listing collection.
Referencing many-to-many relationships
With this application, we learned how to form many-to-many relationships through referencing.
The many-to-many relationship between listings and users was formed through the favoritedByUsers property in listingSchema. Here, we stored an array of references to documents in the User collection.
A many-to-many relationships can be formed by:
- Adding an array field to the Schema:
const listingSchema = new mongoose.Schema({
  // other fields
  favoritedByUsers: [],
});
- Specifying that the array will hold references to the collection on the other side of the relationship:
const listingSchema = new mongoose.Schema({
  // other fields
  favoritedByUsers: [
    {
      type: mongoose.Schema.Types.ObjectId,
      ref: 'User',
    },
  ],
});
In this case, embedding would not have been a viable option as it was with our one-to-many relationship. Unlike one-to-many relationships where a single parent can hold multiple children, in many-to-many relationships, each entity must exist independently in order to form connections to a variety of other entities.
With our many-to-many relationship in place, we utilized the populate() method for data retrieval:
const populatedListings = await Listing.find({}).populate('owner');
Protecting resources
We also learned how to protect resources, ensuring only authorized users can modify them. Protecting resources refers to the process of restricting access to certain actions based on specific user criteria. In our application, we ensured resources like listings can only be modified by their owners.
To do so, we applied the following strategies:
- Conditional rendering on the client-side:
<% if (listing.owner._id.equals(user._id)) { %>
...
<% } %>
- Protected controller actions on the server:
if (listing.owner.equals(req.session.user._id)) {
	...
} else {
	res.send("You don't have permission to do that.");
}
When used in tandem, these strategies produce a robust and secure application.