Intro to Java Setup
Launch the IntelliJ IDEA application.
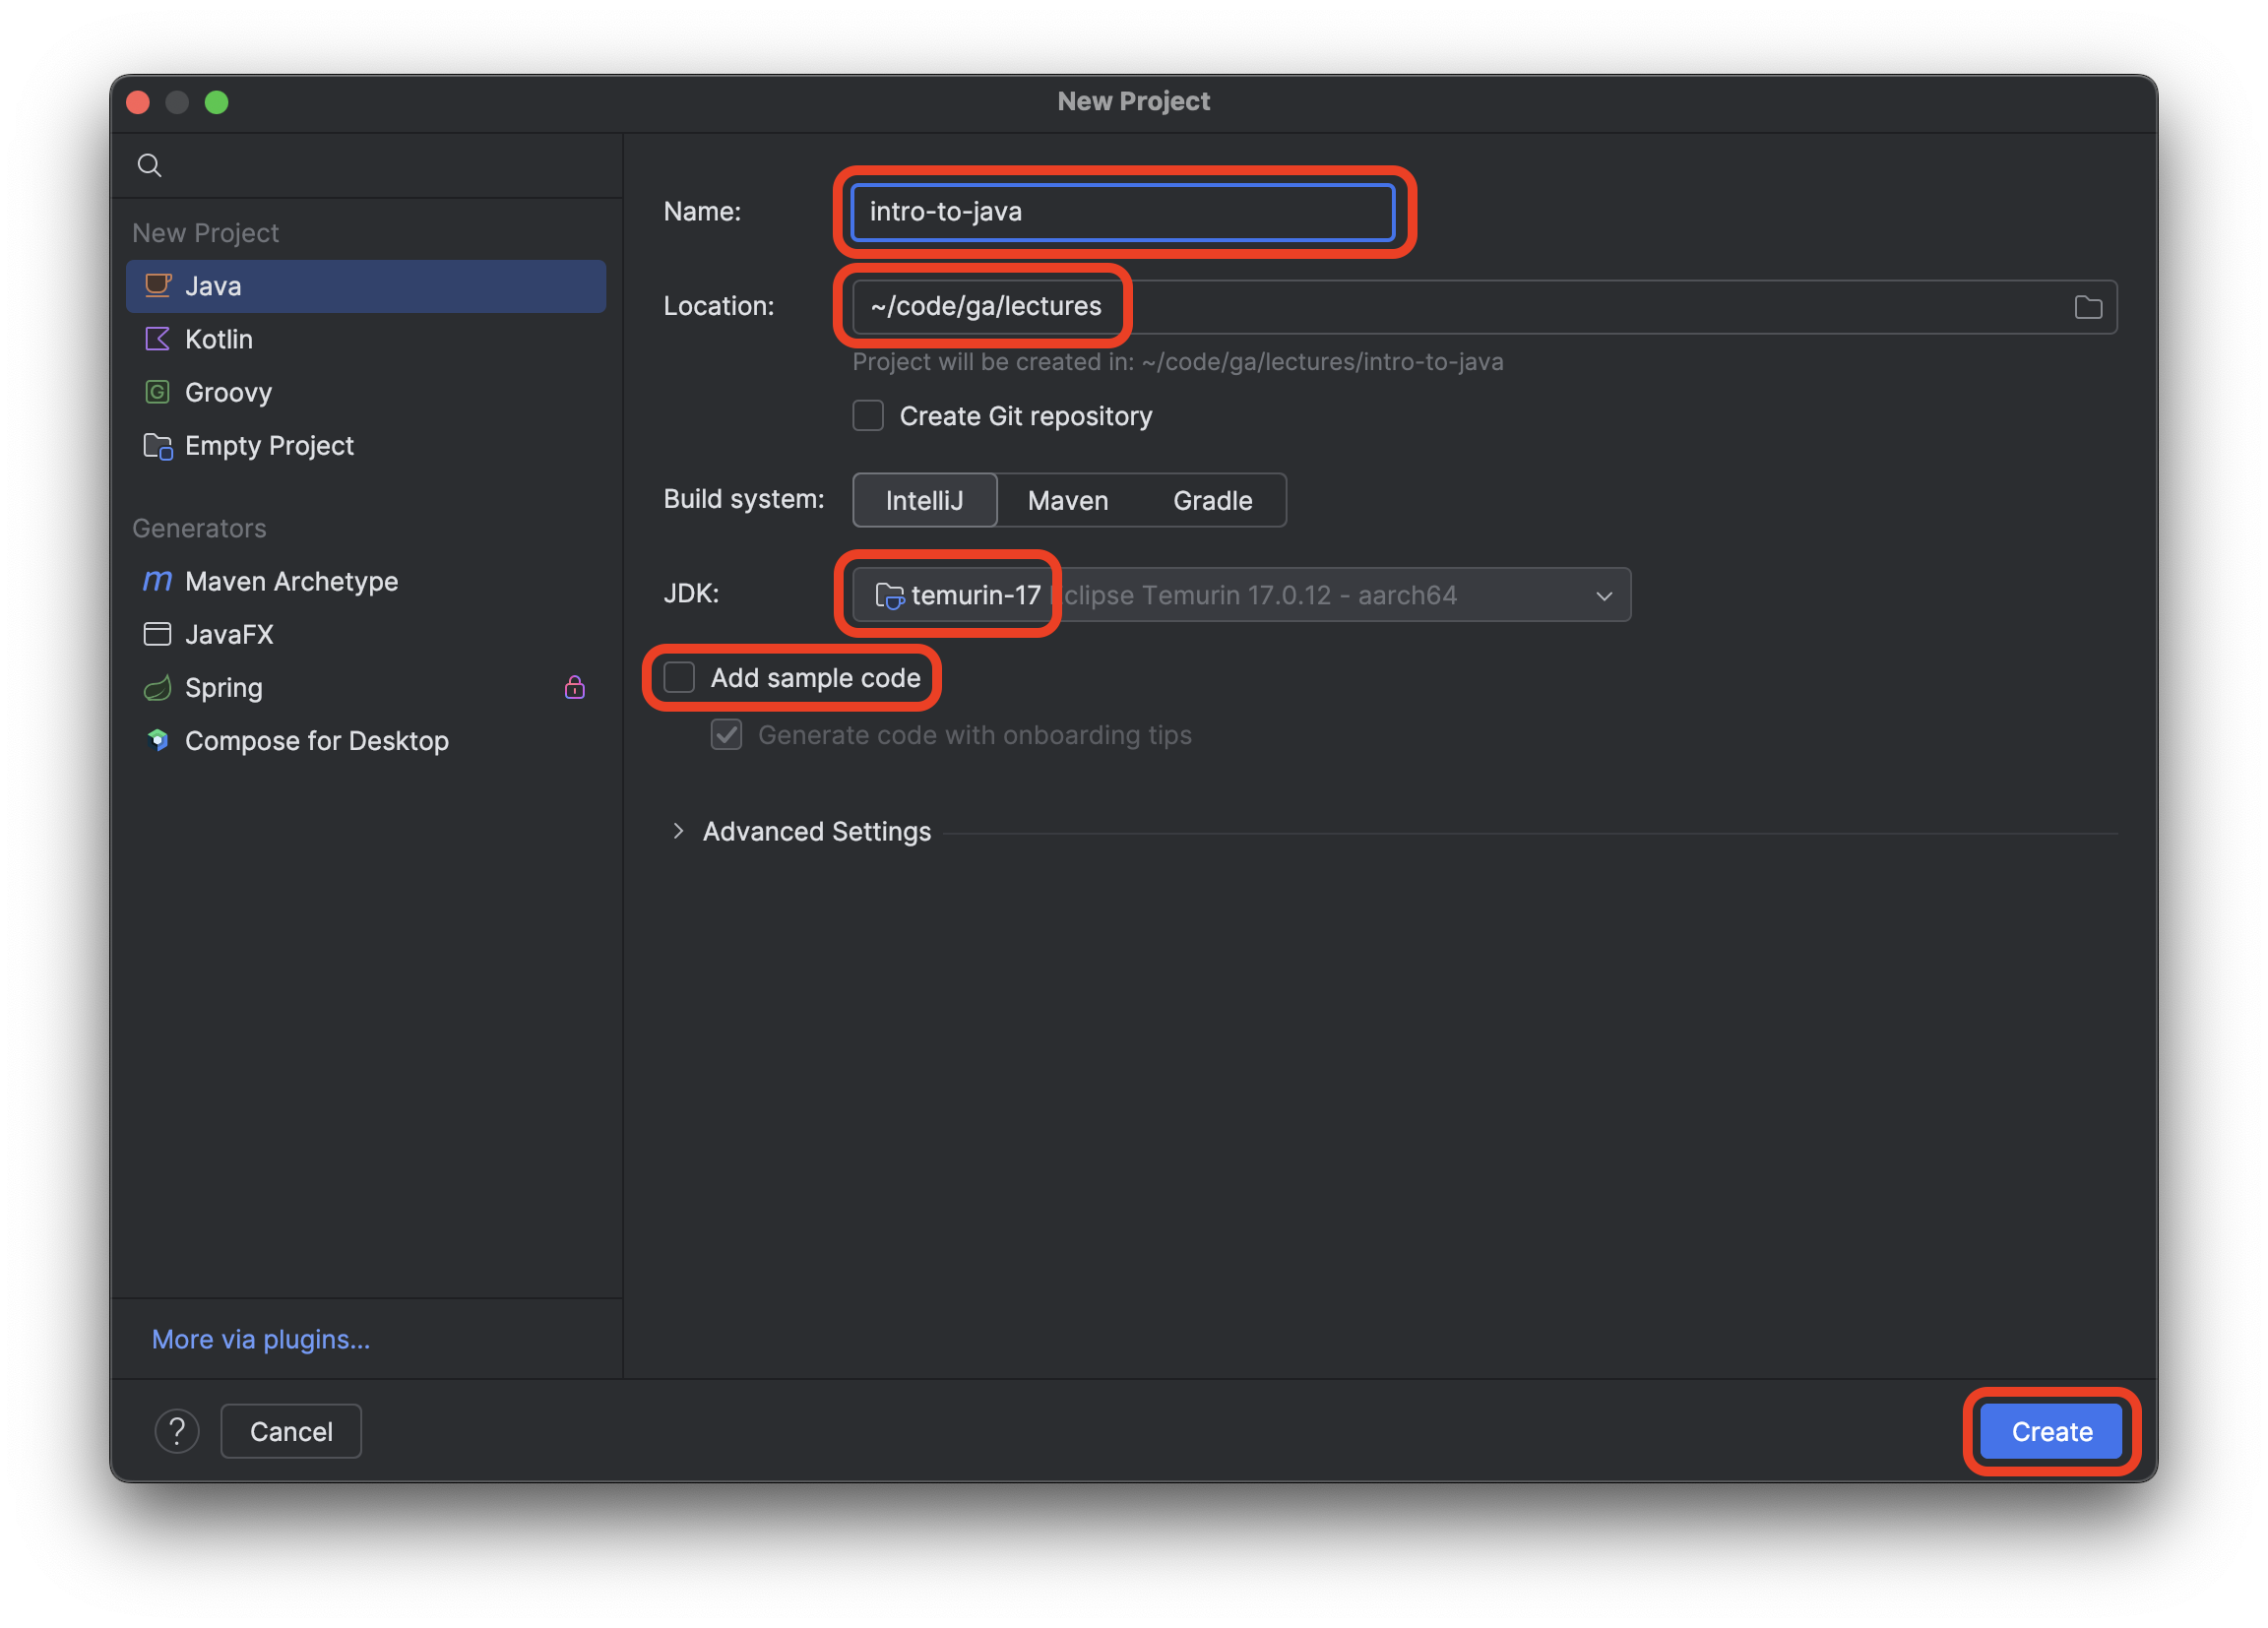
Select the New Project option.
Name the project into-to-java.
Create the project in the ~/code/ga/lectures directory.
⚠️ Windows users, the
lecturesdirectory is likely at this location on your device:C:\Users\username\code\ga\lectures(replacingusernamewith your username). Create the project in that directory instead.
Ensure the JDK used is temurin-17. This should be the default setting when starting a new project. If it’s not, alert your instructor.
Ensure that the Add sample code option is not checked.
After confirming the New project window looks similar to the screenshot below, select the Create button.
If everything goes according to plan, you’ll see a new window like the one below.
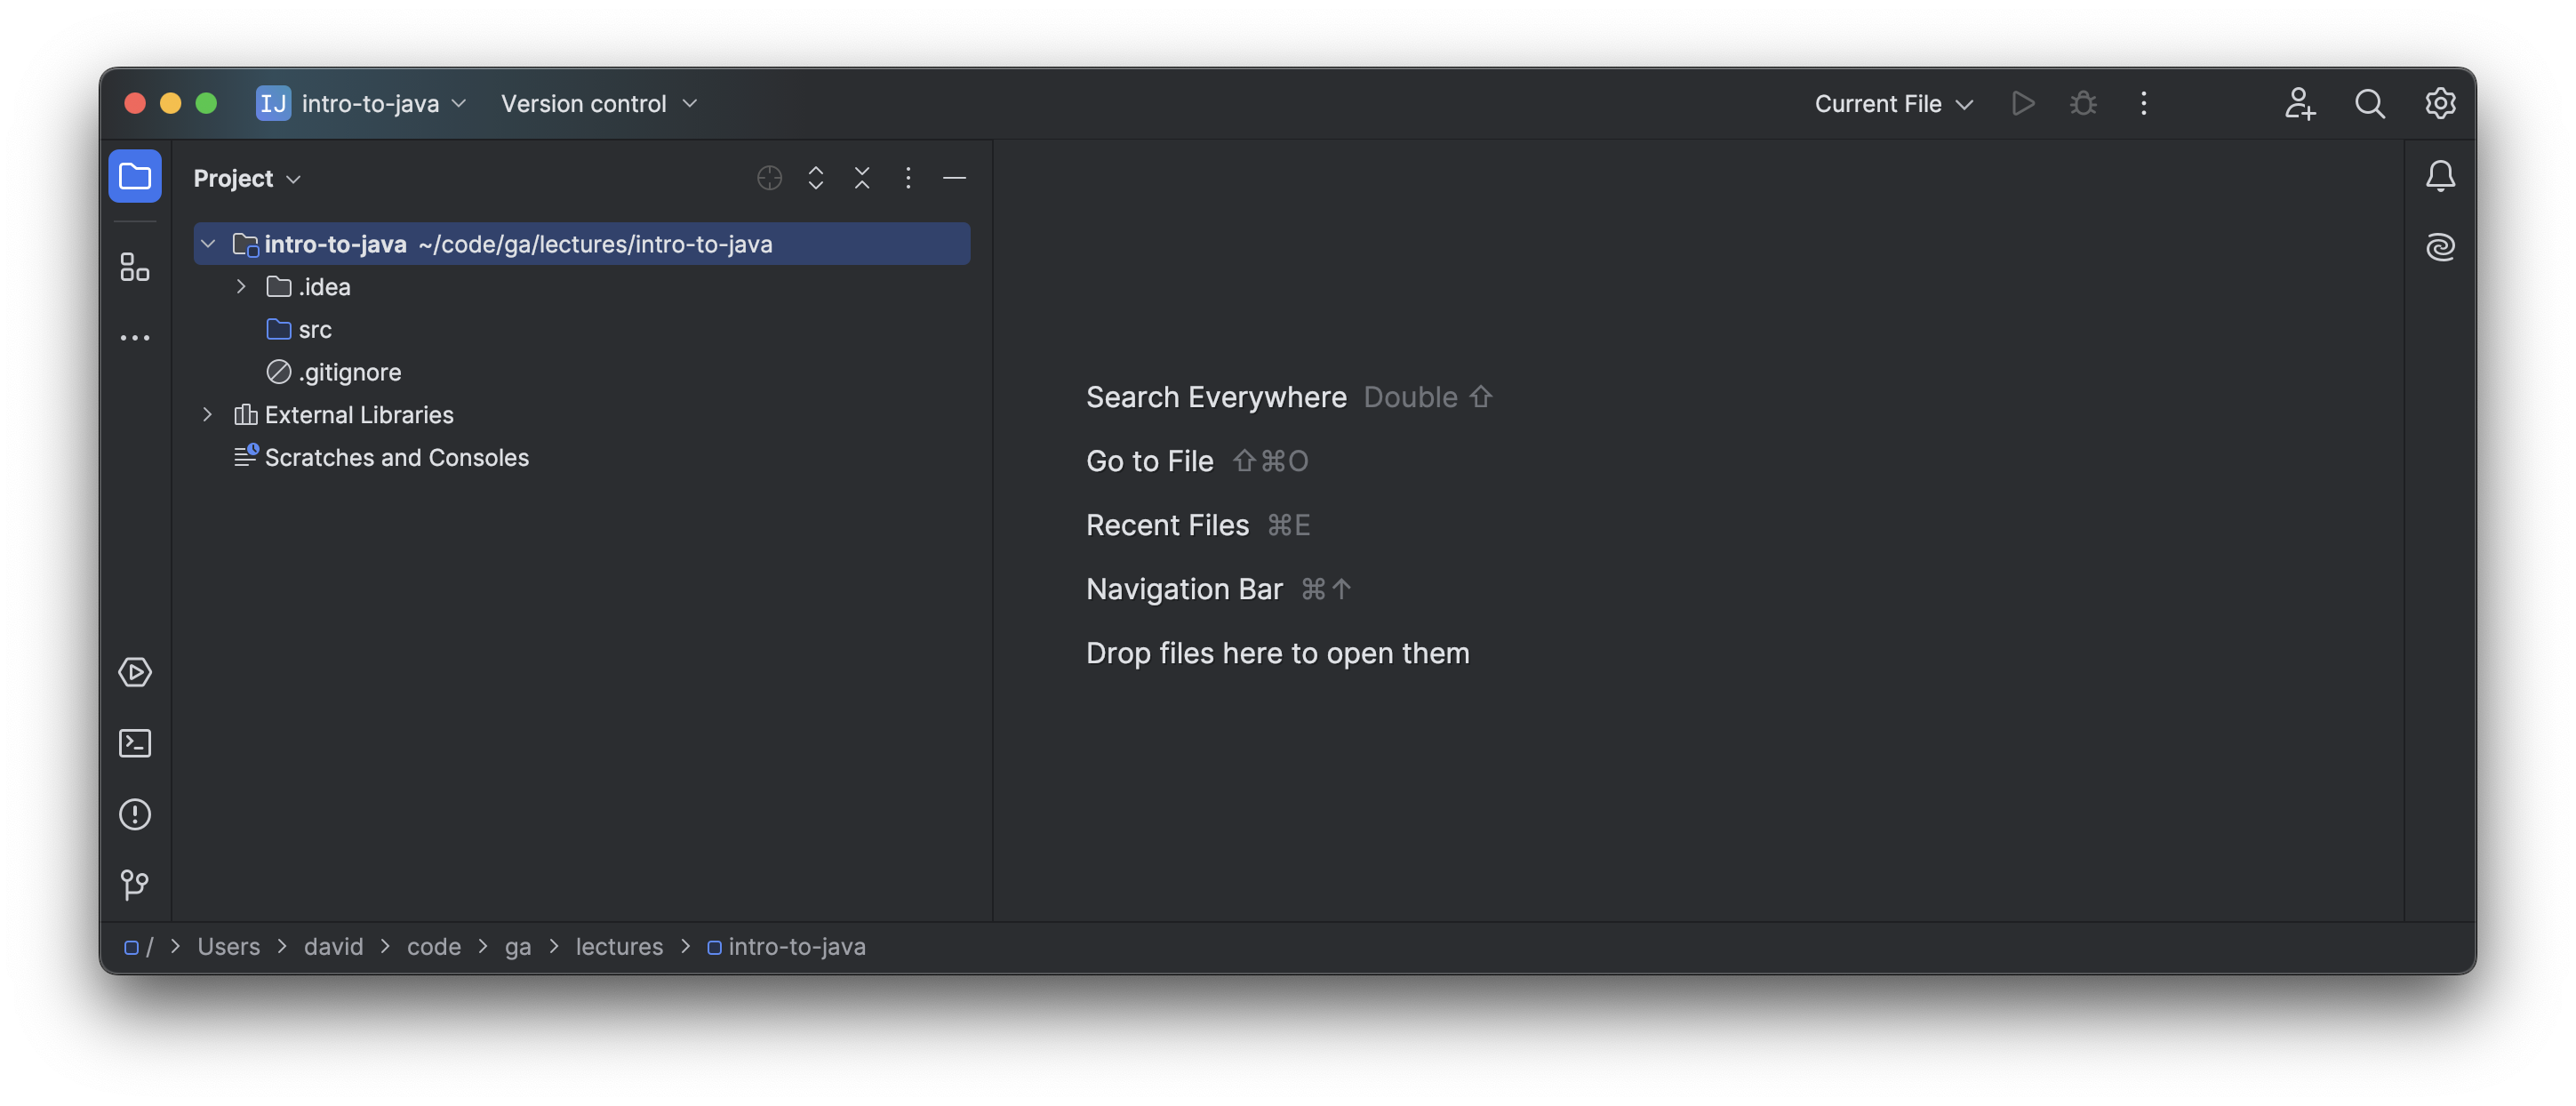
Take the opportunity to note that the new project comes with a very basic file structure:
.ideaholds some workspace configuration settings for the IntelliJ IDEA app.srcholds the Java code we write.- A
.gitignorefile with some sensible defaults pre-configured.
With that done, we’re ready to write our first Java code!