Flexbox Lab Setup
Setup
Open your Terminal application and navigate to your ~/code/ga/labs directory:
cd ~/code/ga/labs
Navigate to GitHub and create a new repository named flexbox-lab.
- Make sure the repo is set to
public - You do not need a
README.md - You do not need a
.gitignore
Using the Quick Setup option, clone your newly created repo into your ~/code/ga/labs directory with the git clone command:
git clone https://github.com/<your-username>/flexbox-lab.git
Note: In the link above, where it says
<your-username>, you should see the username from your GitHub account.
Next, cd into your new cloned directory, flexbox-lab:
cd flexbox-lab
Create a folder called css:
mkdir css
Then, create an index.html file and a style.css file that lives inside the css folder. These files will hold your work for this lab:
touch index.html ./css/style.css
With the files created, open the contents of the directory in VS Code:
code .
Open the index.html file and add HTML boilerplate by typing ! and then hitting the Tab key. Then link the style.css file by adding this line inside the <head> tag:
<link rel="stylesheet" href="./css/style.css">
Copy the following HTML and place it inside the <body>:
  <nav>
    <div id="destinations">
      <p>My Web Design Site</p>
      <p>Learn Design</p>
      <p>Find Inspiration</p>
      <p>Get Hired</p>
    </div>
    <div id="actions">
      <p>🔍</p>
      <p>Sign in</p>
      <button>Sign up</button>
    </div>
  </nav>
  <section id="hero">
    <div id="headers">
      <h1>Explore the world's best web designs.</h1>
      <h2>Created by top-rated design and creative professionals.</h2>
    </div>
    <input type="text" placeholder="Search..."/>
    <div id="trending">
      Trending searches
      <p>Content</p>
      <p>Content</p>
      <p>Content</p>
      <p>Content</p>
    </div>
  </section>
  <div id="subnav">
    <button id="sort">Popular</button>
    <button id="filter">Filter</button>
  </div>
  <main>
    <article class="card">
      <div class="img-placeholder"></div>
      <div class="card-footer">
        <h3>Team</h3>
        <p>❤️ XX 👁️ XX</p>
      </div>
    </article>
    <article class="card">
      <div class="img-placeholder"></div>
      <div class="card-footer">
        <h3>Team</h3>
        <p>❤️ XX 👁️ XX</p>
      </div>
    </article>
    <article class="card">
      <div class="img-placeholder"></div>
      <div class="card-footer">
        <h3>Team</h3>
        <p>❤️ XX 👁️ XX</p>
      </div>
    </article>
    <article class="card">
      <div class="img-placeholder"></div>
      <div class="card-footer">
        <h3>Team</h3>
        <p>❤️ XX 👁️ XX</p>
      </div>
    </article>
    <article class="card">
      <div class="img-placeholder"></div>
      <div class="card-footer">
        <h3>Team</h3>
        <p>❤️ XX 👁️ XX</p>
      </div>
    </article>
    <article class="card">
      <div class="img-placeholder"></div>
      <div class="card-footer">
        <h3>Team</h3>
        <p>❤️ XX 👁️ XX</p>
      </div>
    </article>
    <article class="card">
      <div class="img-placeholder"></div>
      <div class="card-footer">
        <h3>Team</h3>
        <p>❤️ XX 👁️ XX</p>
      </div>
    </article>
    <article class="card">
      <div class="img-placeholder"></div>
      <div class="card-footer">
        <h3>Team</h3>
        <p>❤️ XX 👁️ XX</p>
      </div>
    </article>
  </main>
Add the following to css/style.css:
* {
  box-sizing: border-box;
}

body {
  background-color: gray;
  font-family: system-ui, sans-serif;
  margin: 0;
}

nav {
  background-color: white;
  padding: 8px 16px;
}

p {
  margin: 0;
}

section {
  height: 460px;
  background-color: black;
  color: white;
  padding: 24px 72px;
}

h1,
h2 {
  text-align: center;
}

h1 {
  margin-top: 0;
  font-size: 32px;
}

h2 {
  font-size: 16px;
  margin-bottom: 0;
}

input {
  height: 58px;
  width: 80%;
  max-width: 600px;
  border-radius: 29px;
  border: 0px;
  padding: 0 24px;
}

main {
  background-color: white;
  padding: 32px 72px;
}

nav button {
  background-color: #ea4c89;
  border-radius: 8px;
  padding: 10px 16px;
  border: 0;
  color: #ffffff;
  font-weight: 500;
}

.img-placeholder {
  width: 355px;
  height: 270px;
  background-color: gray;
  border-radius: 8px;
}

.card-footer {
  font-size: 14px;
}

.card-footer * {
  margin-top: 8px;
}

#subnav {
  padding: 32px 72px 0;
  background-color: white;
}

#subnav button {
  border-radius: 8px;
  padding: 10px 16px;
  border: 1px solid black;
  background-color: white;
}

#trending p {
  background-color: white;
  color: black;
  border-radius: 50px;
  padding: 6px 15px;
}
Open the index.html file in your browser.
You should see something that looks like the following in your browser:
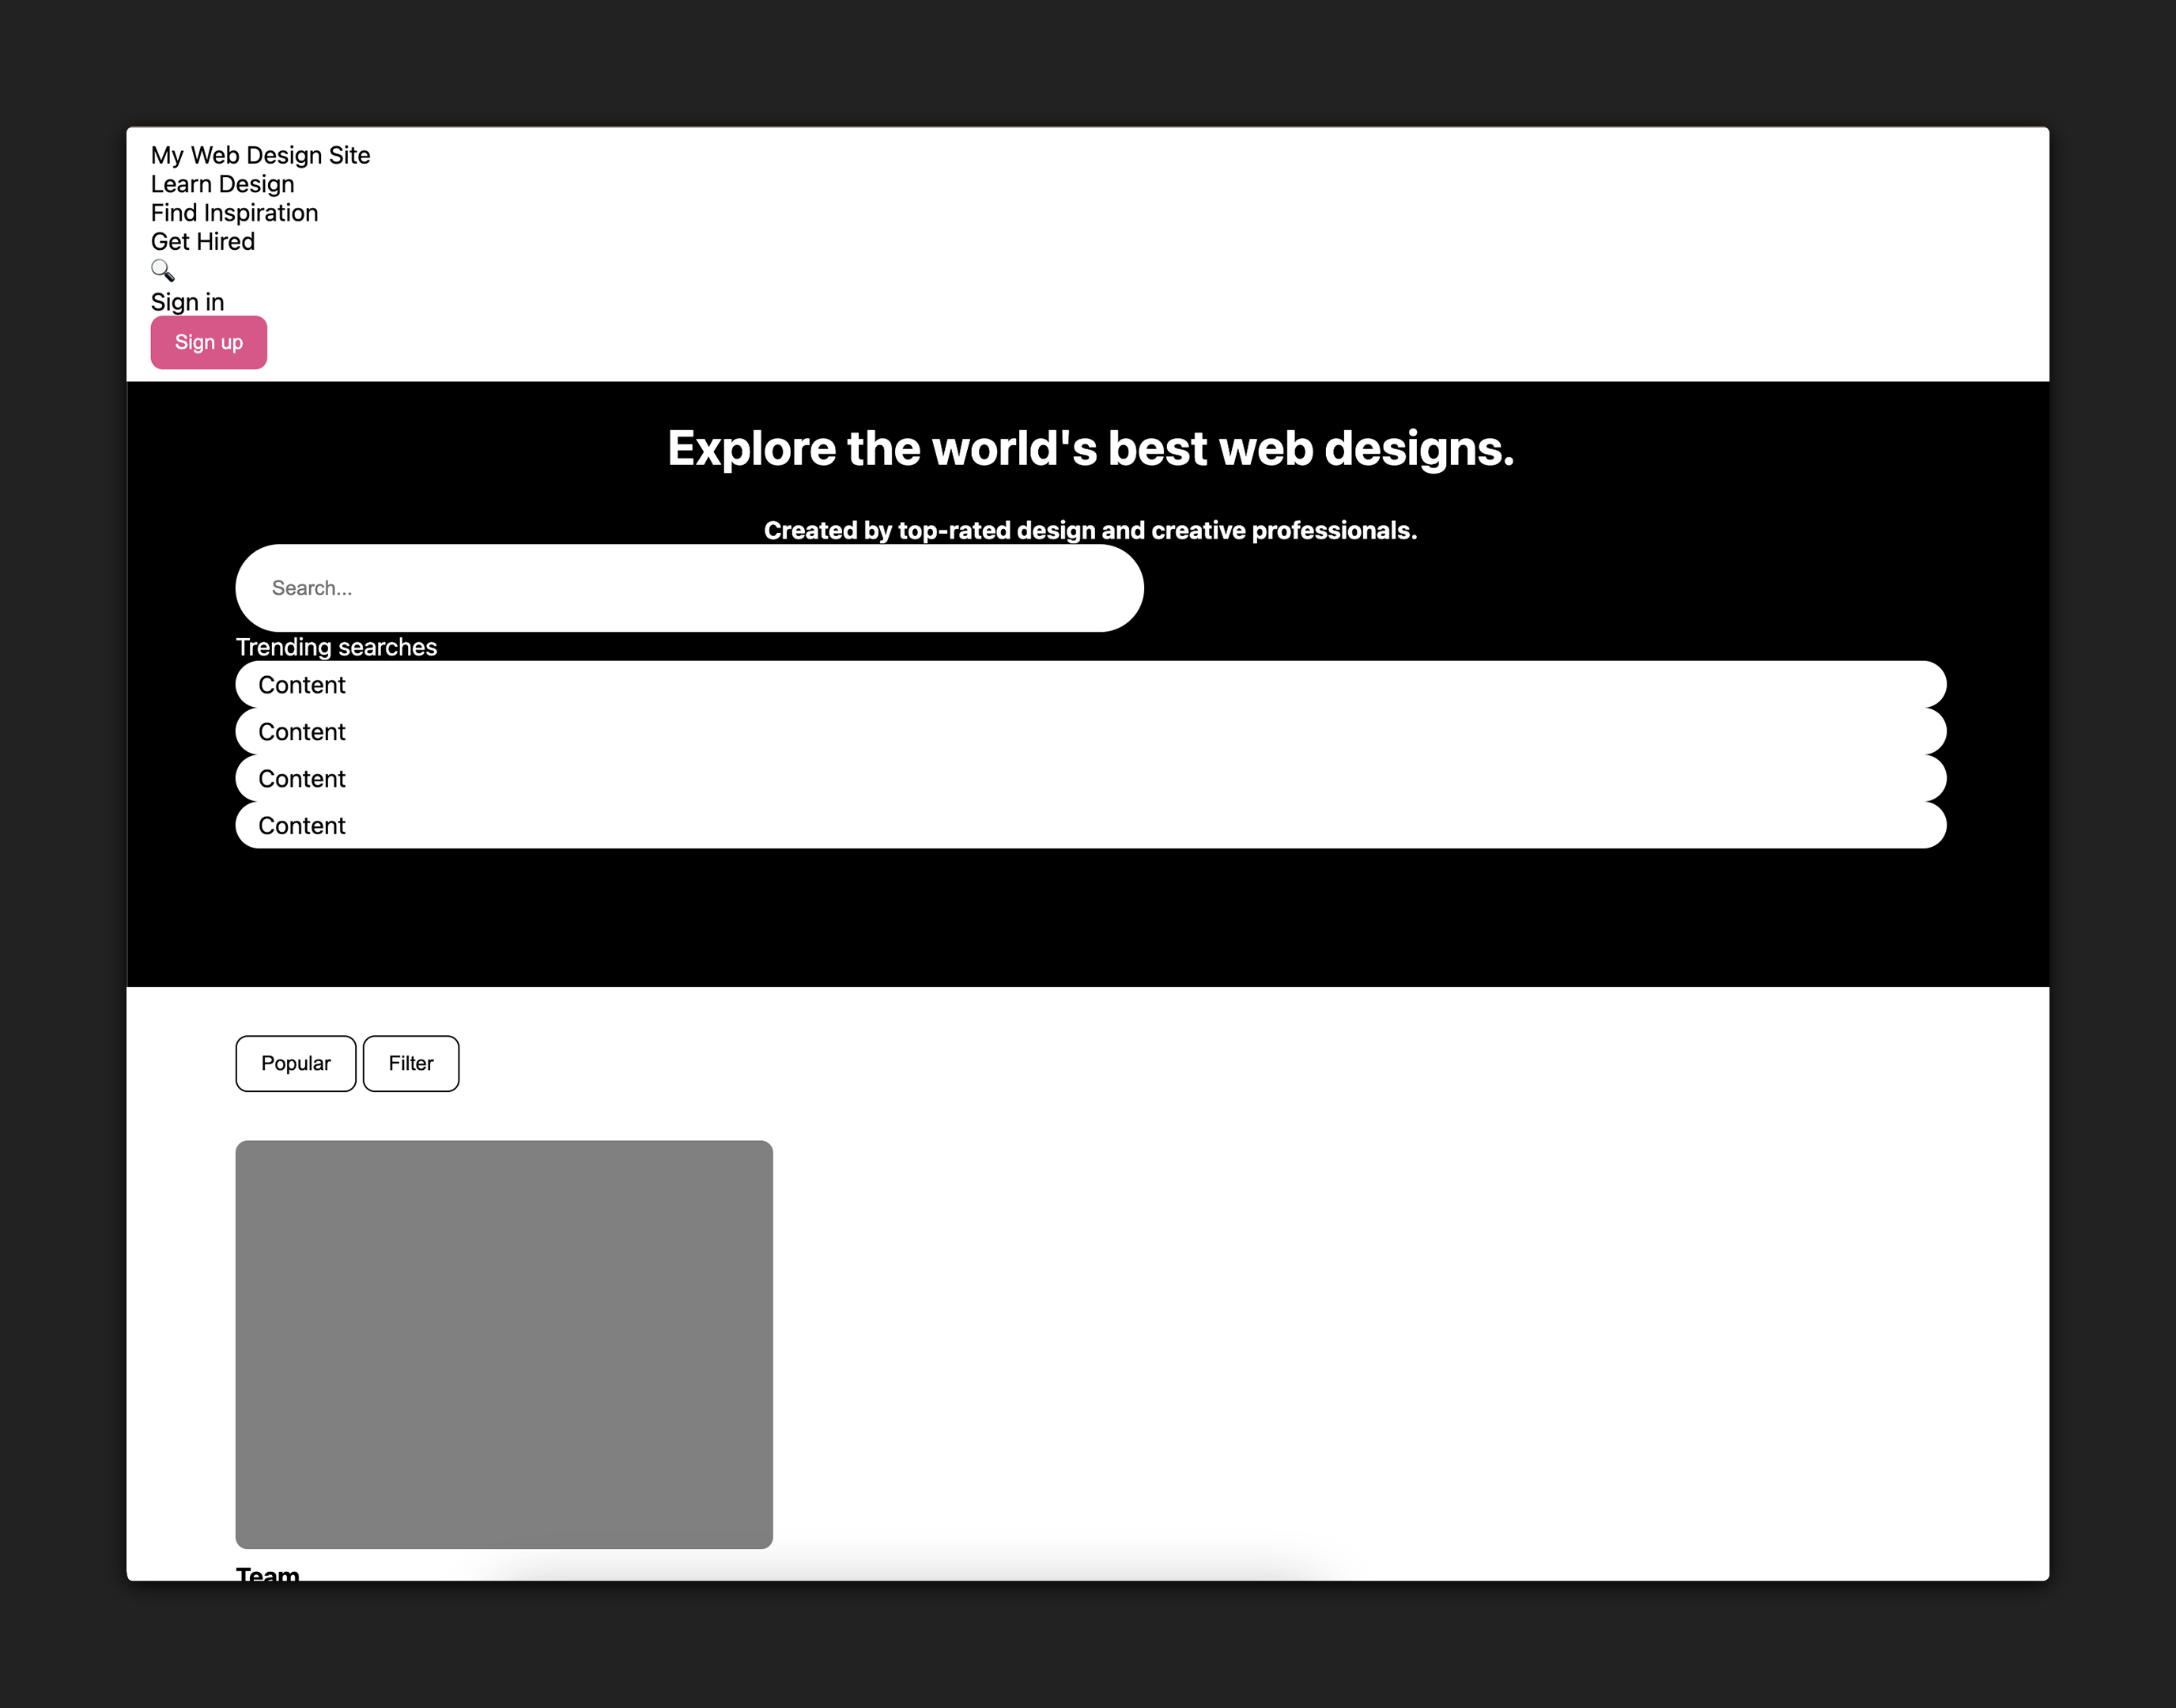
As you can see, all the elements have been styled but need to be laid out properly in flex containers to finalize this design. That is the work you’ll do in the remainder of this lab.
Feel free to explore the starter code, and the styling applied to this page so far, but don’t modify any of the code now.