Controlled Forms in React Lab Exercise
Introduction
In this lab, you’ll explore practical applications of React’s state management through controlled forms. You’ll build a dynamic form that allows users to add entries to a virtual bookshelf, practicing the synchronization of UI and state in React to ensure seamless user interactions.
What you’ll build
The local library is adding a feature to its website where users can add their favorite books to a virtual bookshelf.
You will develop a single component named BookShelf that contains both the controlled form and the display of the bookshelf. Using the useState hook, you will manage the form inputs and list of books, enabling real-time updates to the UI based on user input.
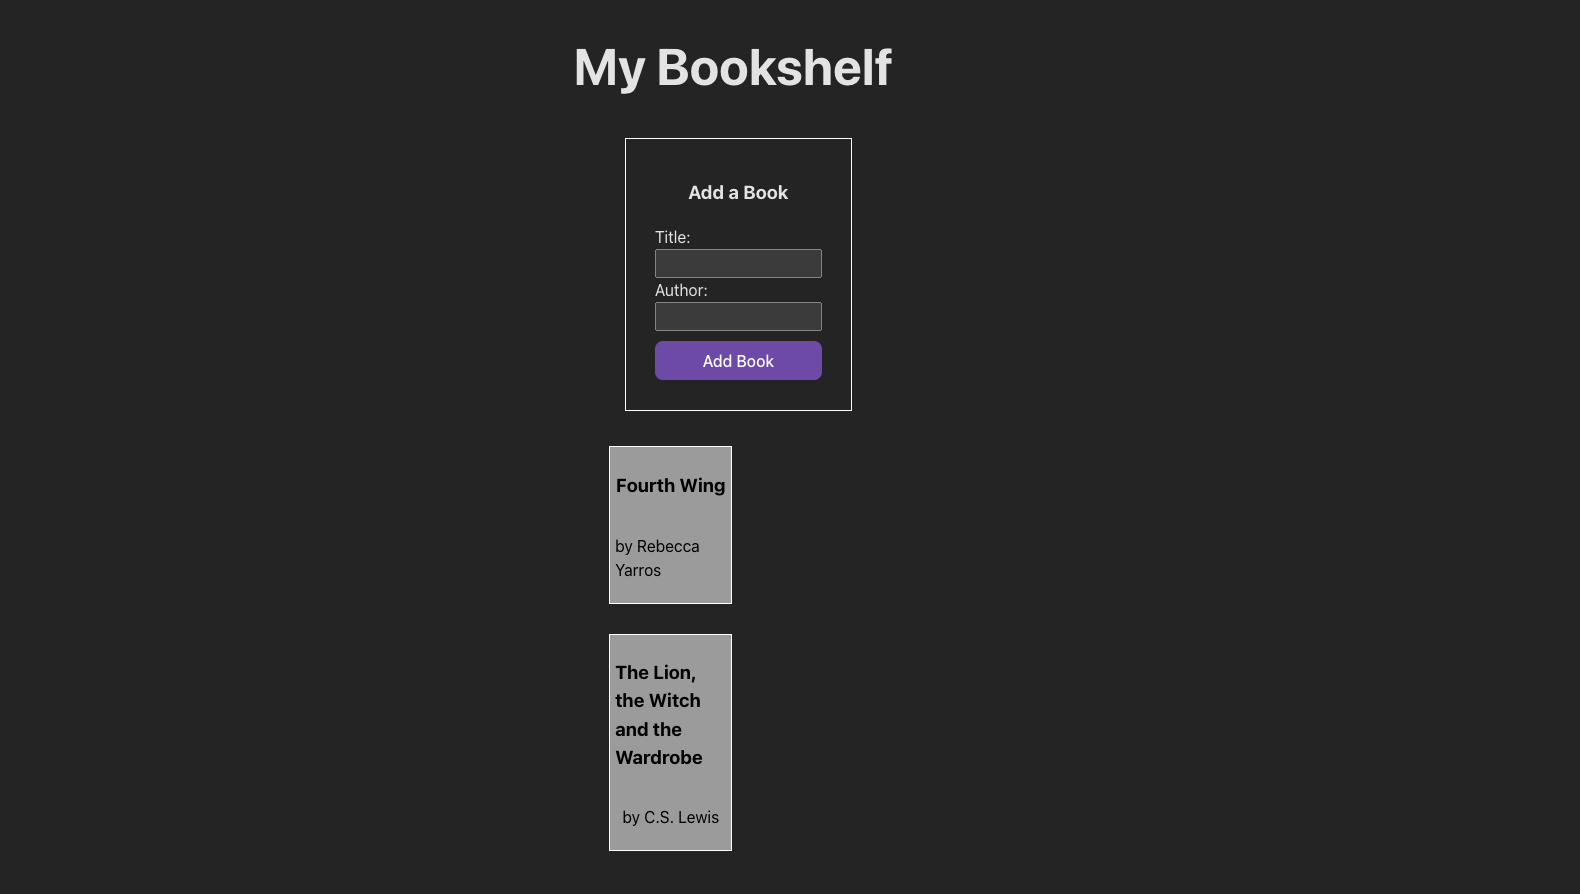
By the end of this lab, you’ll have a functional application where users can add books to a personalized bookshelf, with each new entry updating the display immediately—no page reloads required!
Lab exercises
1. Create your component
Create a new component called Bookshelf:
mkdir src/components
mkdir src/components/Bookshelf
touch src/components/Bookshelf/Bookshelf.jsx
Import useState at the top of the file:
import { useState } from 'react';
Use the following template to set up your BookShelf component:
<div className="bookshelfDiv">
  <div className="formDiv">
    <h3>Add a Book</h3>
    {/* Form will go here */}
  </div>
  <div className="bookCardsDiv">{/* Book cards will display here */}</div>
</div>
Export Bookshelf from this file and import it into App.jsx:
// src/App.jsx
import './App.css';
import Bookshelf from './Bookshelf.jsx';

const App = () => {
  return (
    <>
      <h1>My Bookshelf</h1>
      <Bookshelf />
    </>
  );
};

export default App;
The remainder of the work in this lab will all take place inside Bookshelf.jsx.
2. Define the initial state
Initialize your state in Bookshelf.jsx:
- Create a state variable
booksto store an array of book objects. - Define another state variable,
newBook, to handle the inputs for new book additions. This will be an object with atitlekey and anauthorkey, which should hold empty strings to start.
Example:
const [books, setBooks] = useState([
  { title: 'Fourth Wing', author: 'Rebecca Yarros' },
  { title: 'The Lion, the Witch and the Wardrobe', author: 'C.S. Lewis' },
]);
3. Create event handlers
For this lab, you’ll need two event handlers:
a. handleInputChange
Purpose: This function updates the form’s state as the user types into the input fields.
Instructions:
- Create a function named
handleInputChangethat will be triggered each time the user types in an input field. - The function should take an event object as its argument. Use this event to access the
nameof the input field and the value the user has typed. - Construct a new version of the
newBookobject that includes the updated fields. Make sure you maintain the values of other fields innewBookthat aren’t currently being updated. (Hint: Use the spread operator...to create a new copy of thenewBookobject) - Use the
setNewBooksetter function to update the state ofnewBookwith this new object to reflect the changes in your UI.
b. handleSubmit
Purpose: This function manages the submission of the form, adding a new book to the list, and resetting the input fields.
Instructions:
- Create a function named
handleSubmitthat will execute when the form is submitted. - The function should also take an event object as its argument. Begin the function by stopping the default form submission action using
event.preventDefault(). - Use the
setBookssetter function to update thebooksarray state with this new list to include the newly added book. You’ll need to copy the current list of books and add the new book details fromnewBookto this list. (Hint: Use the spread operator...) - Reset the
newBookstate to its initial empty values to clear the form fields, preparing them for the next entry.
4. Form creation
- Use JSX to create a form within your
BookShelfcomponent. The form should include sections for “Title” and “Author”. - Add input fields for both “Title” and “Author”. These inputs will allow users to enter the details for the book they want to add to the shelf.
- Ensure each input field is connected to the corresponding property in the
newBookstate object. Use thevalueattribute to display the current state and theonChangeattribute to update the state as the user types. - Include a submit button in the form. Attach your
handleSubmitevent handler to the form’sonSubmitattribute to handle the form submission.
5. Map through your books
- Within the
BookShelfcomponent, use themapfunction to iterate over thebooksarray. This array contains the list of books added by the user. - For each book in the array, create a “book card”. Use a
<div>to wrap the display of each book’s title and author. - Ensure each book card is distinct and clearly displays the title and author of the book.