Building Your First React App Looping with JSX Elements
Learning objective: By the end of this lesson, students will be able to use the map() method to loop through arrays and transform them into JSX elements.
Looping with JSX elements
Since we’ll be demonstrating how to loop over data to create JSX elements, we’ll need some new data. Below the todo object in src/App.jsx, let’s add an array of to-dos:
// src/App.jsx

const App = () => {
  const todo = { text: 'A brand new task', done: true };
  // add the todos array below the existing todo object.
  const todos = [
    {text: 'Learn JavaScript', done: true},
    {text: 'Learn JSX', done: false},
    {text: 'Learn HTML', done: true},
    {text: 'Learn CSS', done: true},
    {text: 'Master React', done: false},
  ];

  return (
    <>
      <h1>JavaScript in JSX</h1>
      <p>{todo.text}</p>

      <h2>Conditional Rendering</h2>
      <p>{todo.done ? `Task Completed - ${todo.text}` : todo.text}</p>
    </>
  );
};
Transforming arrays into lists of elements
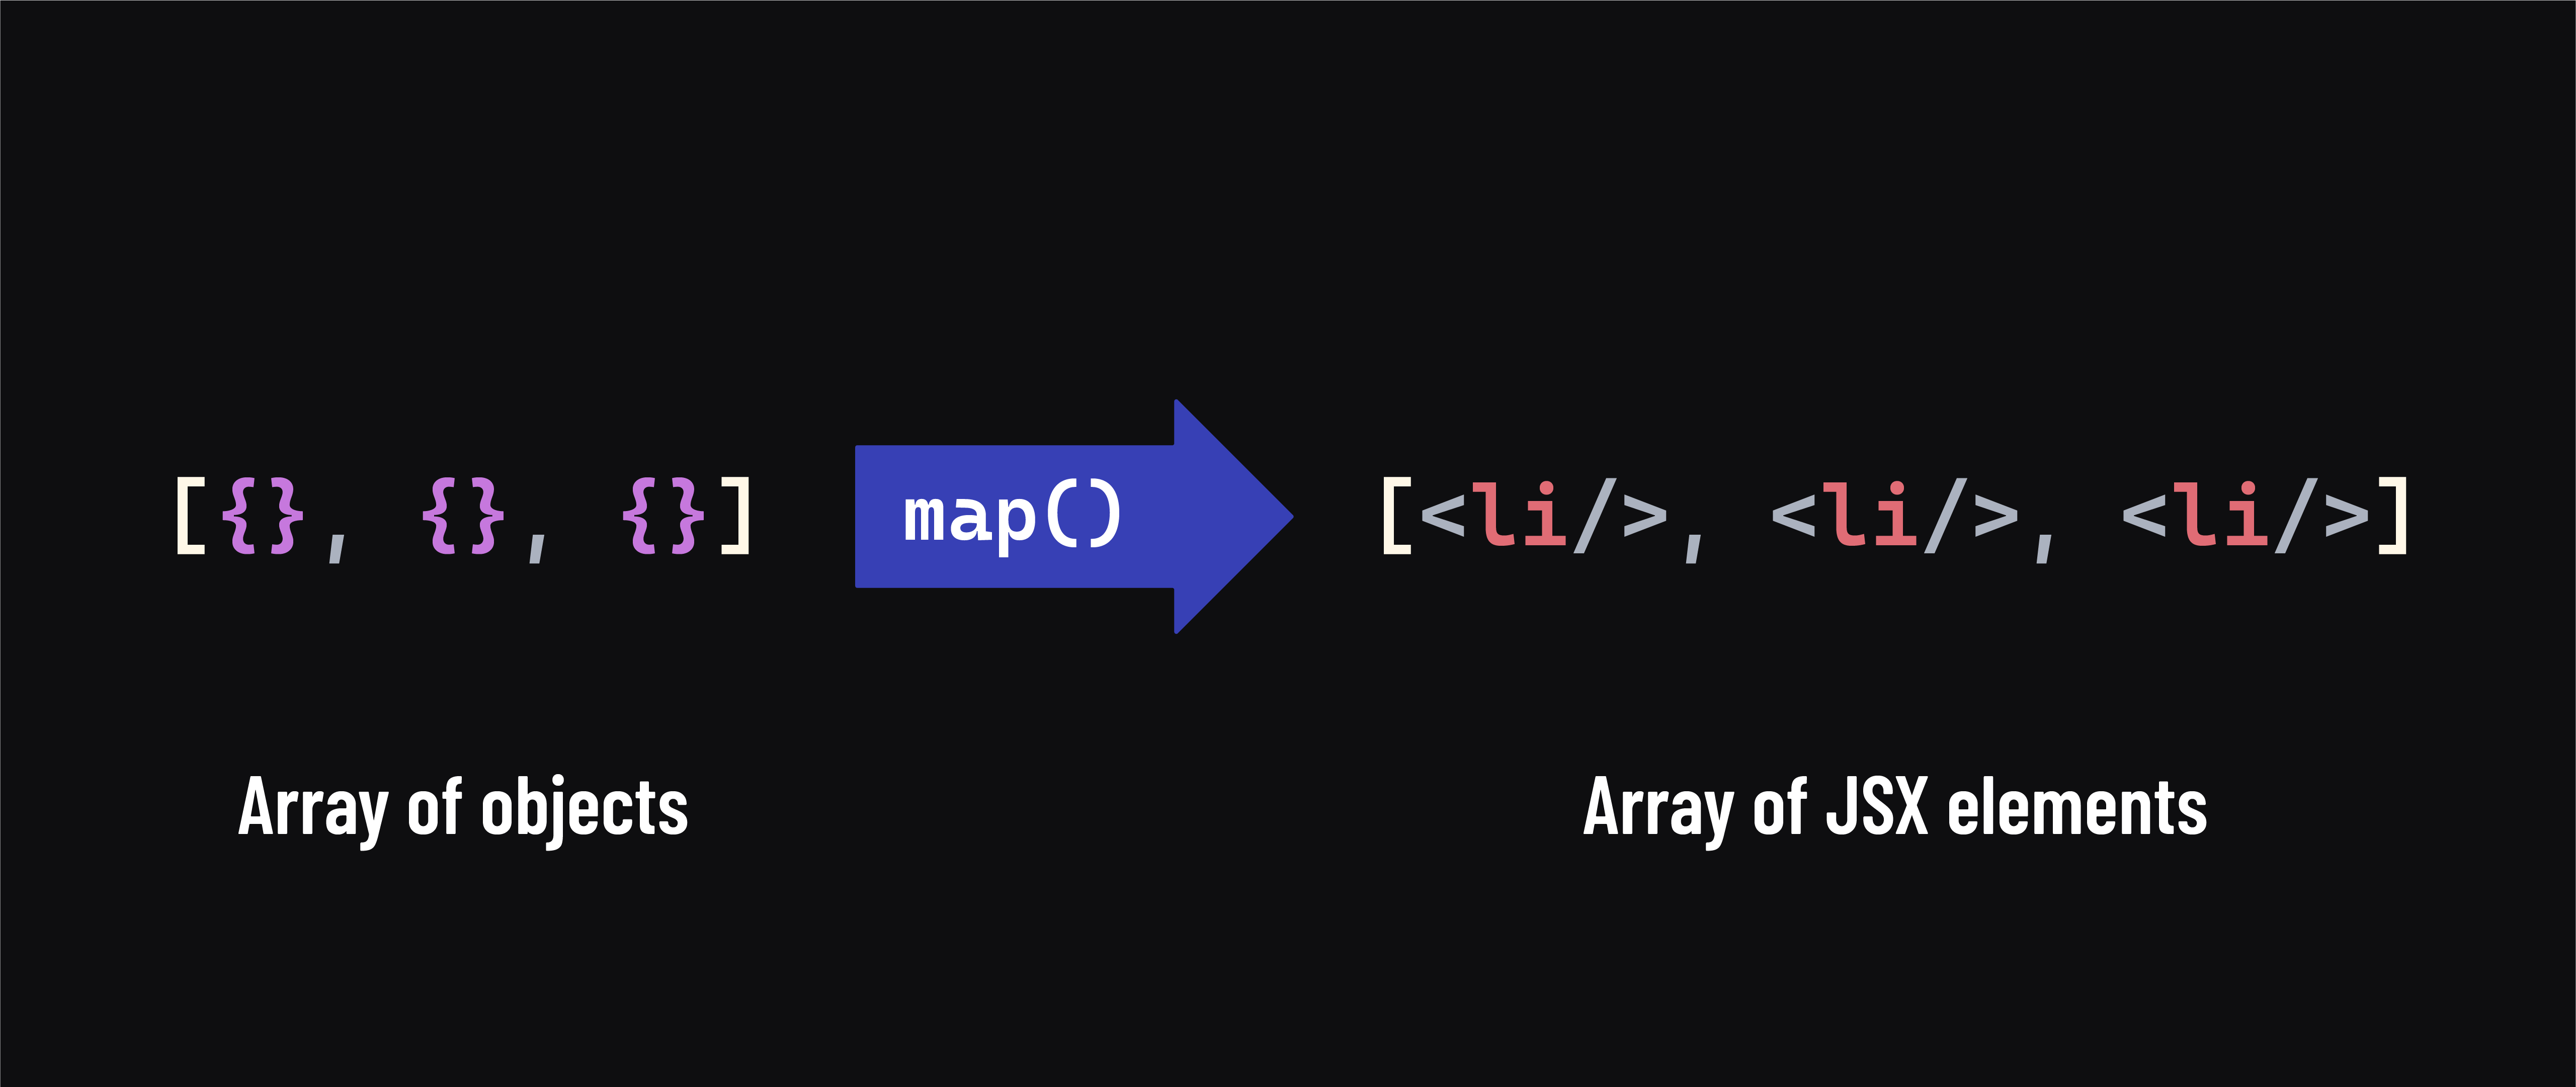
To display a list in JSX, we must transform an array of data into an array of JSX elements - this means that our array iterator methods must return a new array. map() is the most common way to do this in JSX, but others, like filter(), can also be useful.
🚨
forEach()is not a useful iterator method when working with JSX, as it does not return anything.
Using our data above, we can map the todos into a new array where each element is transformed into JSX nodes:
// src/App.jsx

const App = () => {
  const todo = { text: 'A brand new task', done: true };
  const todos = [
    {text: 'Learn JavaScript', done: true},
    {text: 'Learn JSX', done: false},
    {text: 'Learn HTML', done: true},
    {text: 'Learn CSS', done: true},
    {text: 'Master React', done: false},
  ];

  return (
    <>
      <h1>JavaScript in JSX</h1>
      <p>{todo.text}</p>

      <h2>Conditional Rendering</h2>
      <p>{todo.done ? `Task Completed - ${todo.text}` : todo.text}</p>

      <h2>Looping with JSX</h2>
      <ul>
        {todos.map((todo) =>
          <li>{todo.text}</li>
        )}
      </ul>
    </>
  );
};

export default App
Check the browser! You should see all of the todos in a list! If we check the console, however, we also notice a warning:

Let’s touch on that next:
The importance of keys
React uses keys to help identify which items have been added, removed, or changed in an array. Keys must be given to the elements inside an array - if you forget, React will loudly remind you in the console!
Ideally, each key will be a string that uniquely identifies a list item - typically, this would be an ID generated by a database.
As we are using example data without IDs, we will use the index of each element (provided to us as the second parameter in the map() callback function) to simulate a unique key for each list item. Adjust your map() as follows:
// src/App.jsx

const App = () => {
  const todo = { text: 'A brand new task', done: true };
  const todos = [
    {text: 'Learn JavaScript', done: true},
    {text: 'Learn JSX', done: false},
    {text: 'Learn HTML', done: true},
    {text: 'Learn CSS', done: true},
    {text: 'Master React', done: false},
  ];

  return (
    <>
      <h1>JavaScript in JSX</h1>
      <p>{todo.text}</p>

      <h2>Conditional Rendering</h2>
      <p>{todo.done ? `Task Completed - ${todo.text}` : todo.text}</p>

      <h2>Looping with JSX</h2>
      <ul>
        {todos.map((todo, index) =>
          <li key={index}>{todo.text}</li>
        )}
      </ul>
    </>
  );
};
Note that using index is not ideal, as an element’s index may change if the order or contents of the array changes. This method is a temporary solution until we have more robust data.
Extracting map() from the return
The pattern above may feel familiar if you’re used to working in a templating tool like EJS or Liquid. You can see that inside the <ul>, <li> elements will display the text for an individual todo.
However, React documentation and many sources on the web will extract the map() out of the return to make the return more concise and potentially more readable. Here’s what that looks like:
// src/App.jsx

const App = () => {
  const todo = { text: 'A brand new task', done: true };
  const todos = [
    {text: 'Learn JavaScript', done: true},
    {text: 'Learn JSX', done: false},
    {text: 'Learn HTML', done: true},
    {text: 'Learn CSS', done: true},
    {text: 'Master React', done: false},
  ];

  const todoList = todos.map((todo, index) =>
    <li key={index}>{todo.text}</li>
  );

  return (
    <>
      <h1>JavaScript in JSX</h1>
      <p>{todo.text}</p>

      <h2>Conditional Rendering</h2>
      <p>{todo.done ? `Task Completed - ${todo.text}` : todo.text}</p>

      <h2>Looping with JSX</h2>
      <ul>{todoList}</ul>
    </>
  );
};

export default App
Above, we’re assigning the result of calling todos.map() to a todoList variable. The todoList holds an array of <li> elements inside of it. We then use the todoList inside the <ul> element, exactly where we called todos.map() before.
This pattern is slightly more abstract but makes the return section of the App component more intuitive to read:
“Inside of the
<ul>, there is atodoList.”
If we were to write the map() inside the <ul>, it would read more like the following:
“Inside of the
<ul>, we map over thetodosarray to build a collection of<li>elements that have the text for a todo inside of them”.
Ultimately, you will see both patterns in the wild, and you should be able to recognize and write both. Going forward in our lessons, we will write map() functions inside our return statements.